
Table of Contents
Basic Workflow
Step-by-Step, follow the basic workflow to get started using the self-serve (both billable and non-billable) 3D printers at the GSD. When first getting familiar with the workflow, it’s important to perform these steps in the order presented below:
Prepare geometry in Rhino (or Other CAD application)
Before exporting your model, review the 3D Printing File Preparation Tutorial for guidance on print orientation, minimum feature sizes, and how to prepare a successful print.
- Check Your Object
- Place the object near the origin (0,0,0).
- Scale and orient the object for printing.
- Make sure your design is smaller than the maximum print area for the Bambu P2S = 10″ (256mm) x W=10″ (256mm) x H=10″ (256mm)
- Converting the model to millimeter units is advisable
- Close the geometry.
- In Rhino, use the ‘Volume’ command to check if it is watertight.
- Select the object(s) you wish to print and ‘ExportSelected’ as a 3MF (.3mf) or Stereolithography (.stl) file.
- You do not need to convert your object into a mesh before exporting it
- Files cannot be larger than 25 MB.
- Go to https://simplyprint.io/login/harvard_university_gsd
- Select ‘Harvard University GSD’ from the drop-down menu.
- Enter HarvardKey Credentials
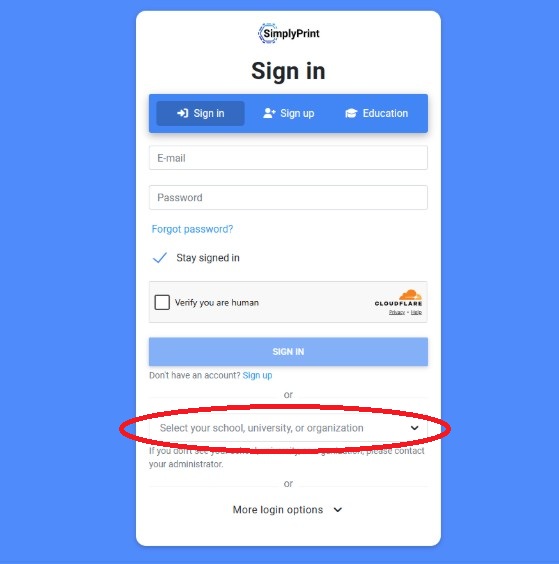
It is important to log-in as described. Signing-in or creating an account without selecting the “Harvard University GSD” organization will not connect you to the GSD printers and will also require a few more steps for you to join the organization afterward. Contact us if you are unable to connect or find printers upon successful log-in.
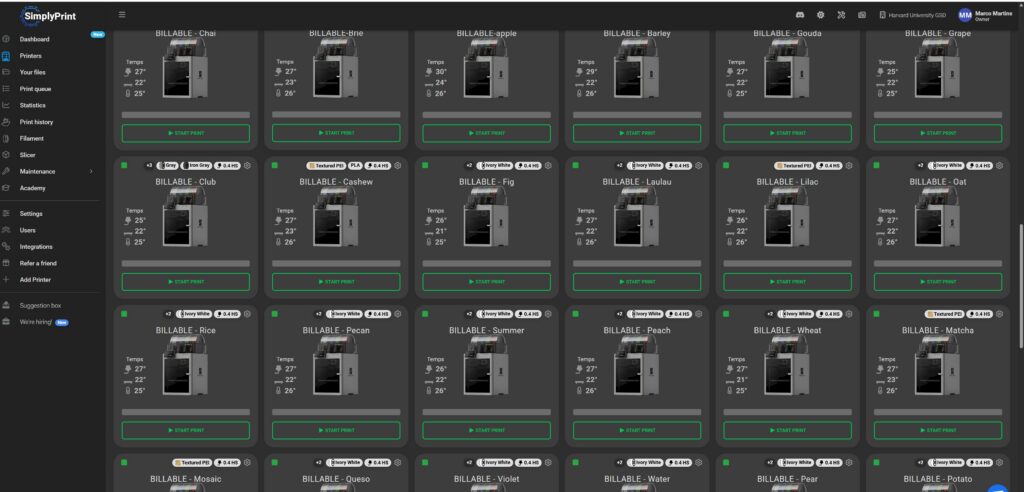
If all required training is complete, you should have access to the available printers at the GSD once logged in. Verify this by clicking on ‘printers’ to view a list of all printers.
Individuals who are either term-billable (students) or have authorization to use a 33-digit billing code (some courses, research, or administrative departments) will see additional “Billable” devices.
- Click ‘Your files’ on the right-side menu, then click the ‘blue icon with an arrow up’ to open the upload window.
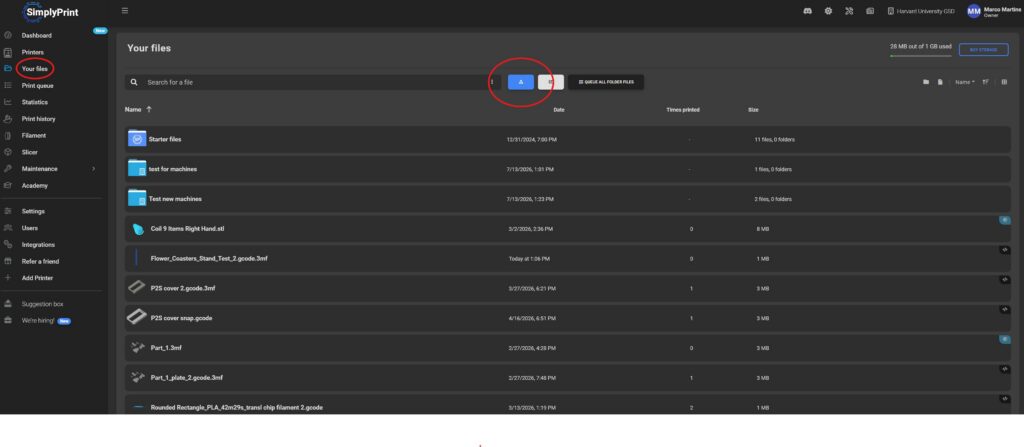
- Once the upload window opens, choose the file you want to upload.
- Click ‘Slicer‘, then ‘add’ (
 ) to prompt the upload window.
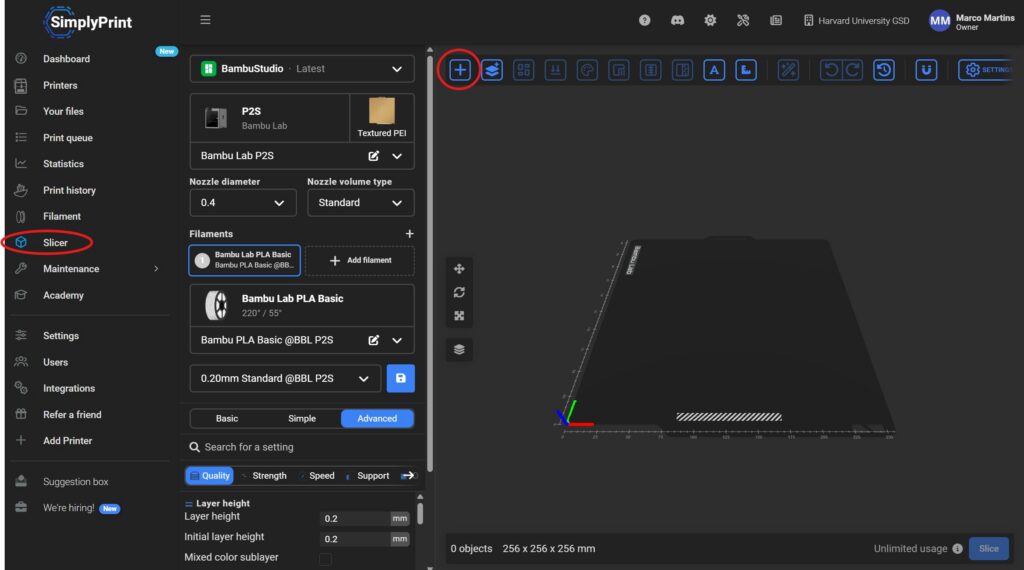
- Once the upload window opens, click ‘Upload file’ and choose the .3mf file you just exported from Rhino or CAD software, or drag and drop your file into the ‘Drop file here’ window.
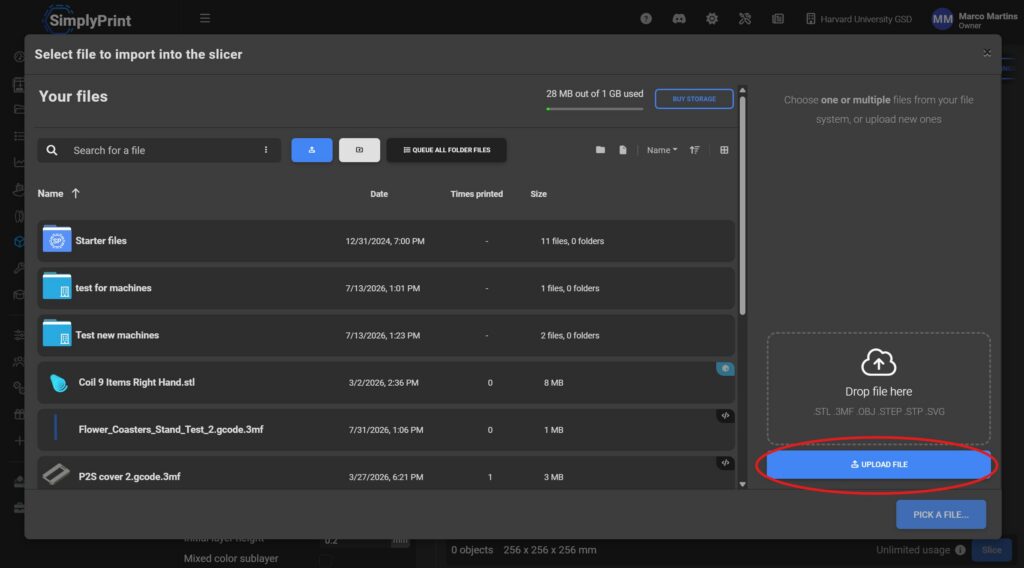
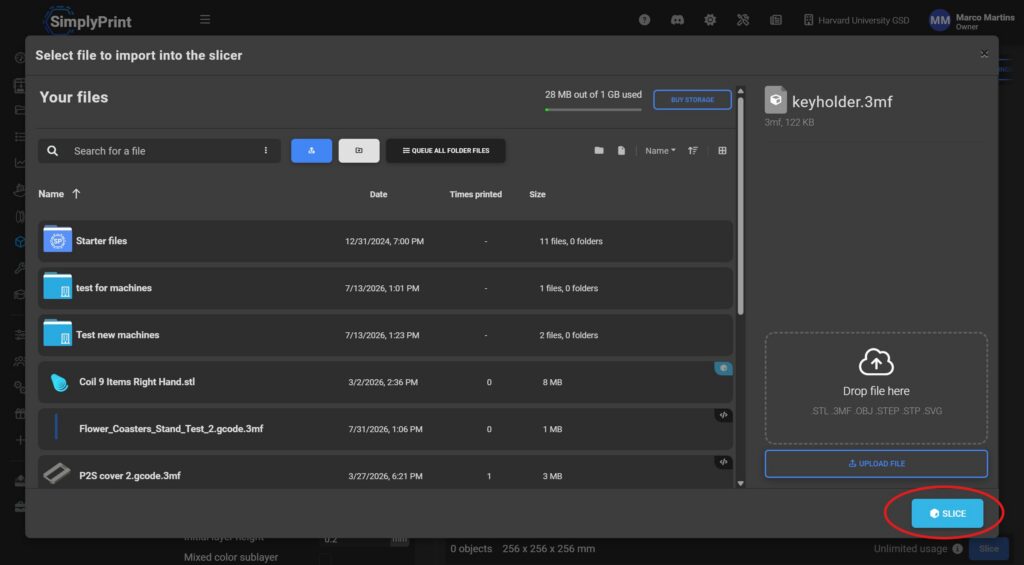
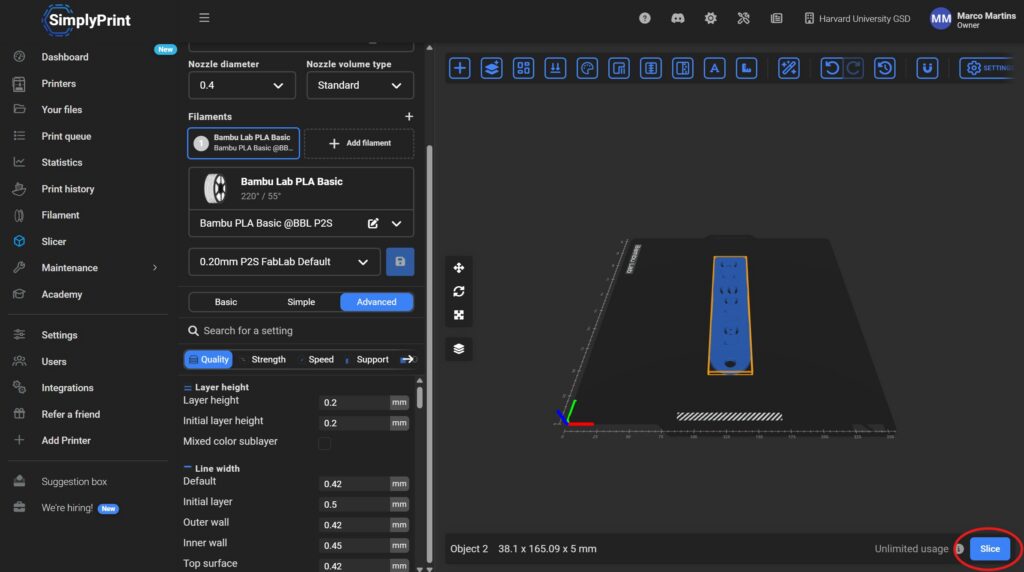
- After your file is selected, click ‘Slice’ on the bottom right of the screen
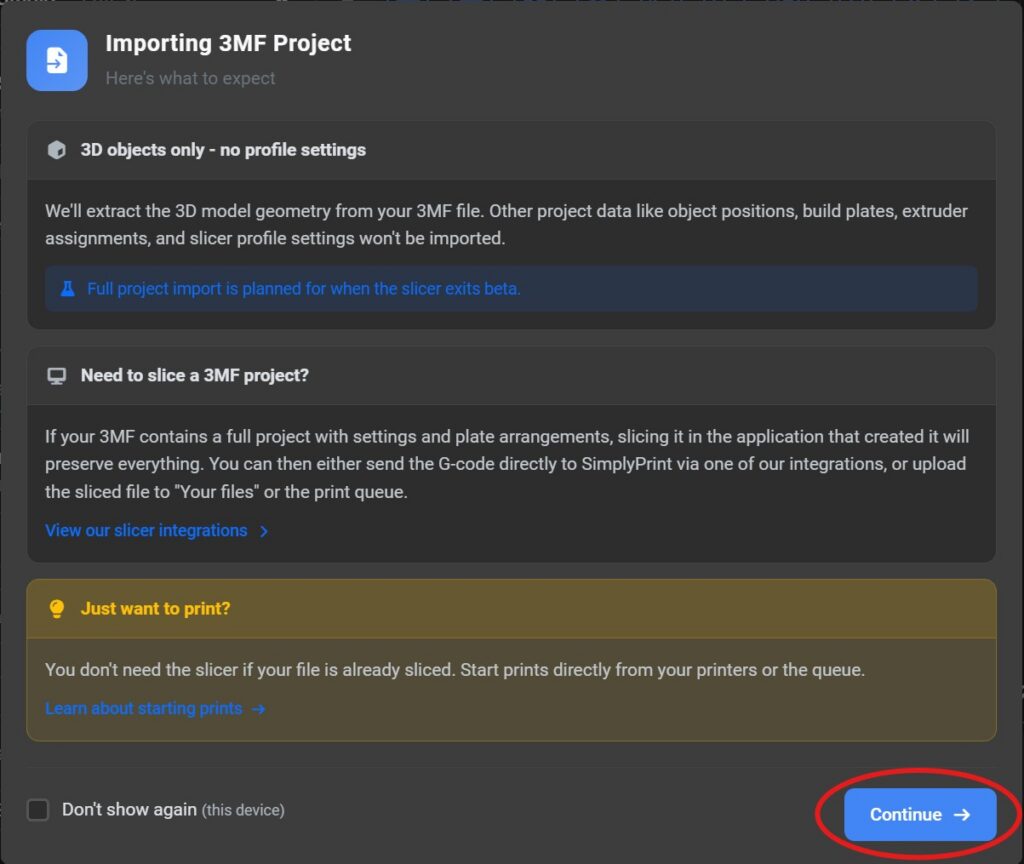
- A new window will open, click on ‘continue’ to load the model into the slicer
- You can use the ‘smart rotate’ icon on top of the screen to automatically rotate the piece for a more efficient print
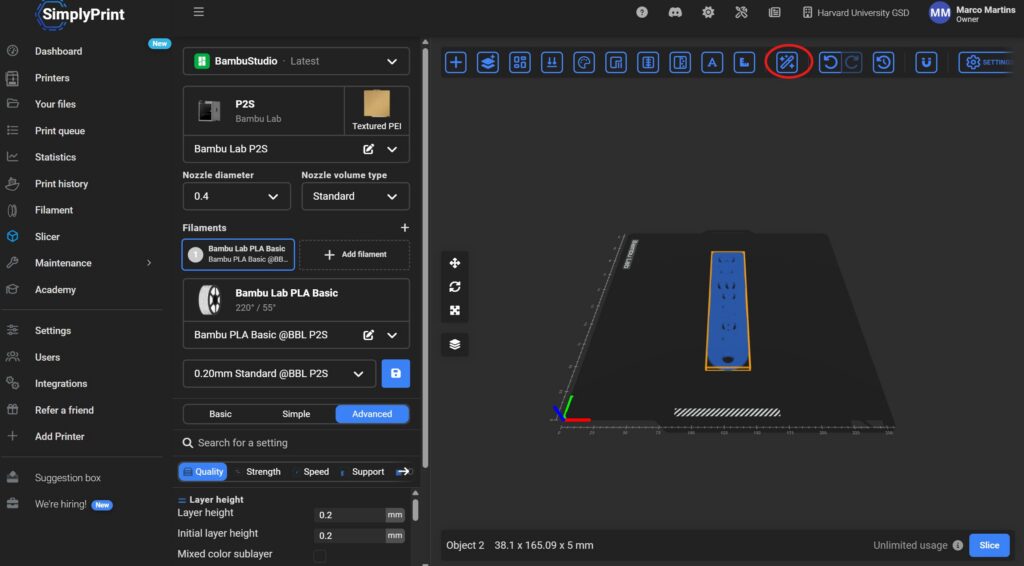
- Choose the type of printer and plate you want to use
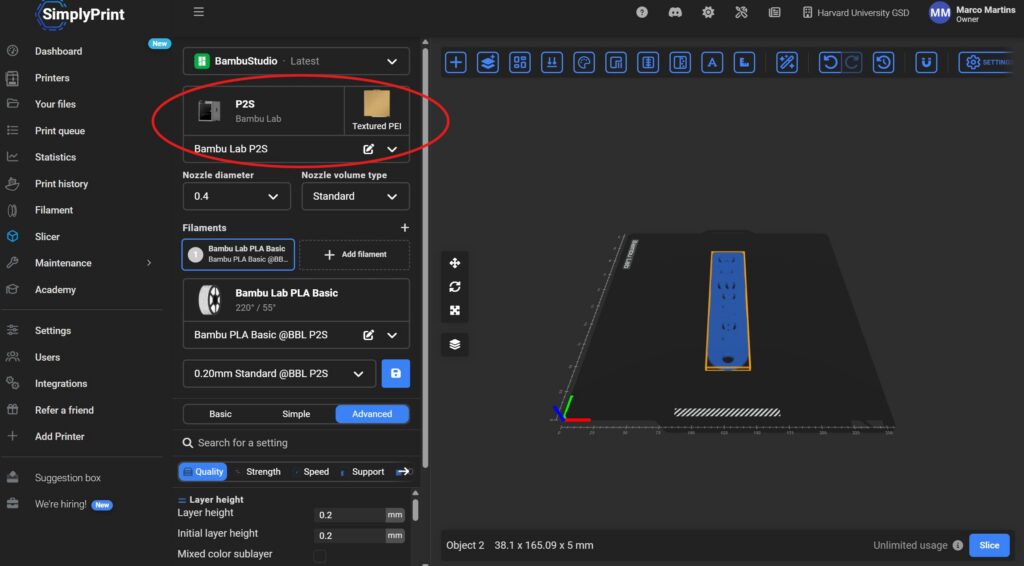
- Choose the filament you want to use
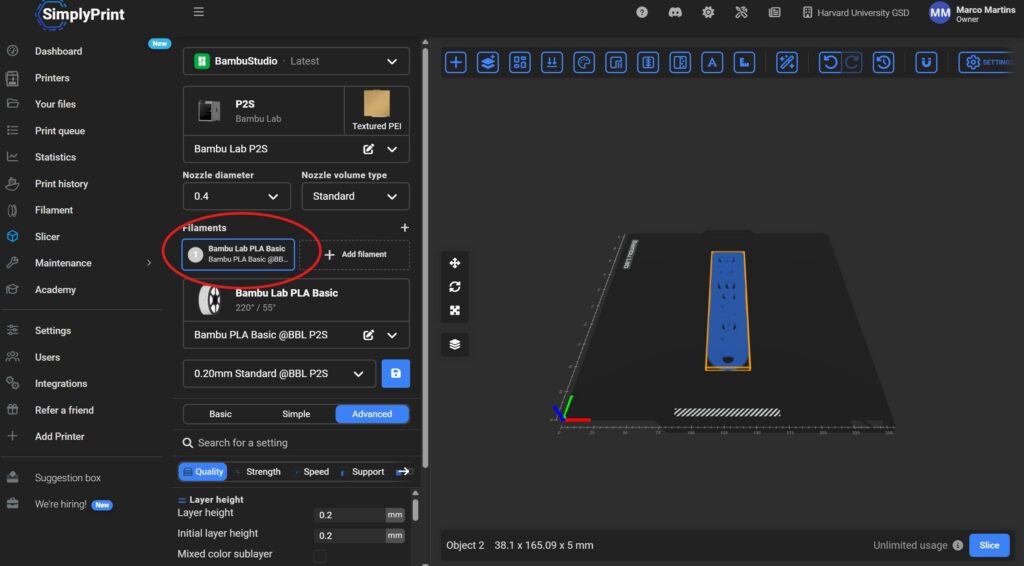
- Choose a slice preset you want to use:
- The ‘FabLab Default’ is suitable for most needs
- The ‘FabLab Fast’ is intended for building and parts that do not need mechanical strength, and it is faster than the default
- The ‘FabLab Vacuum Former’ is intended for parts that will be used to as a mold with the vacuum former machine
- Other presets can be created by Fabrication Lab staff for specific uses upon request.
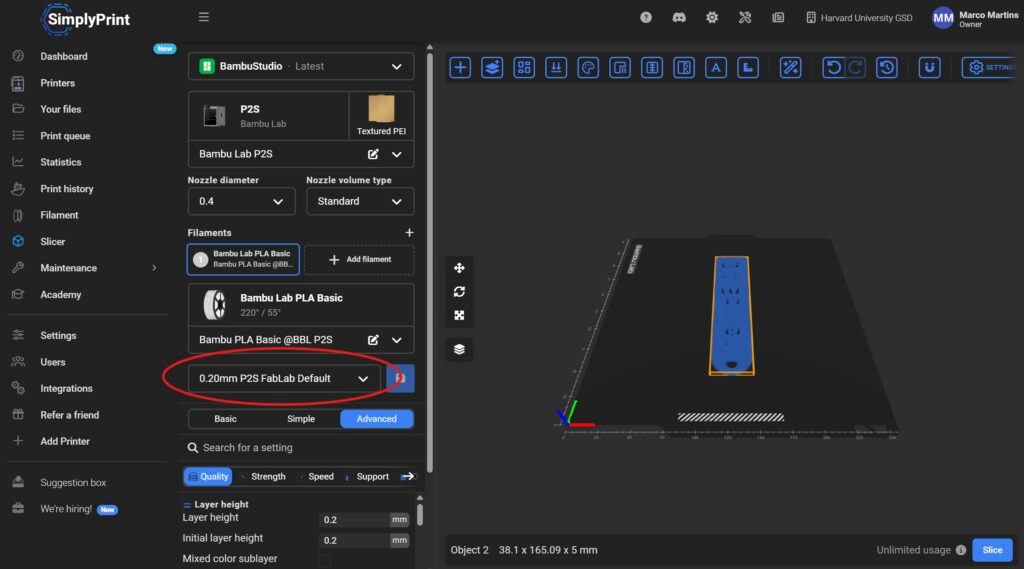
- Make any changes you need to the ‘Quality – Strength – Speed – Support – other’
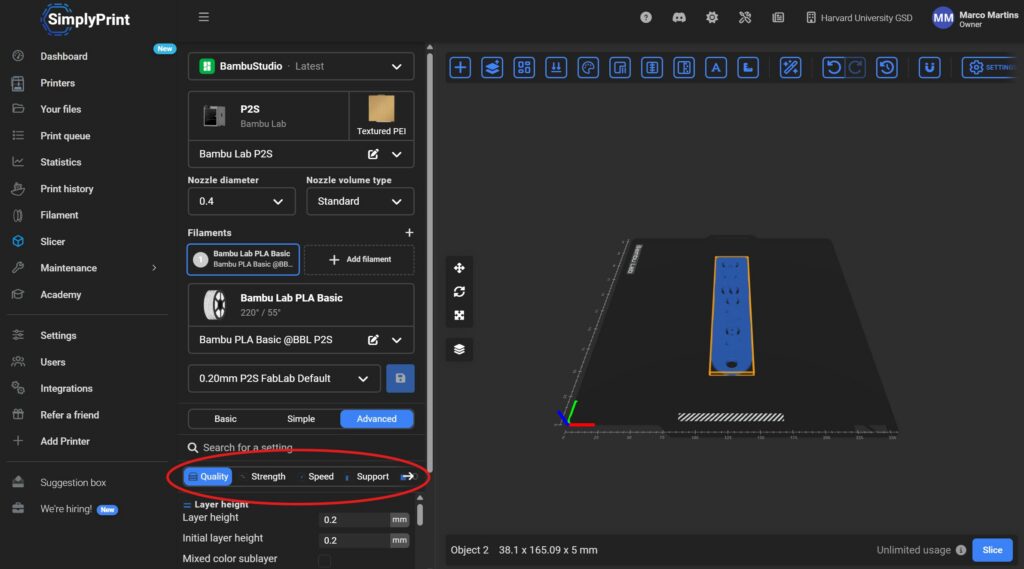
- Then click on ‘Slice’ in the bottom right corner of the screen
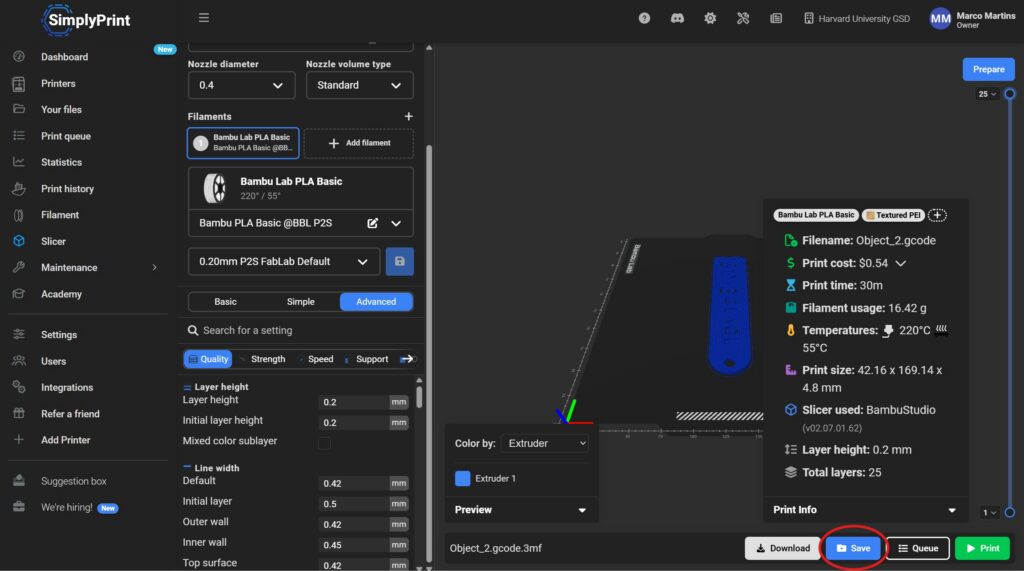
- After the part is sliced, you can verify the amount of filament needed, how much time it will take to print, and the number of layers. By sliding the bar on the right side of the screen, you can verify how each layer will be deposited. It is advisable to examine how the first layer is deposited to verify whether any floating objects or missing parts could cause the print to fail.
- If everything looks good, click ‘Save’
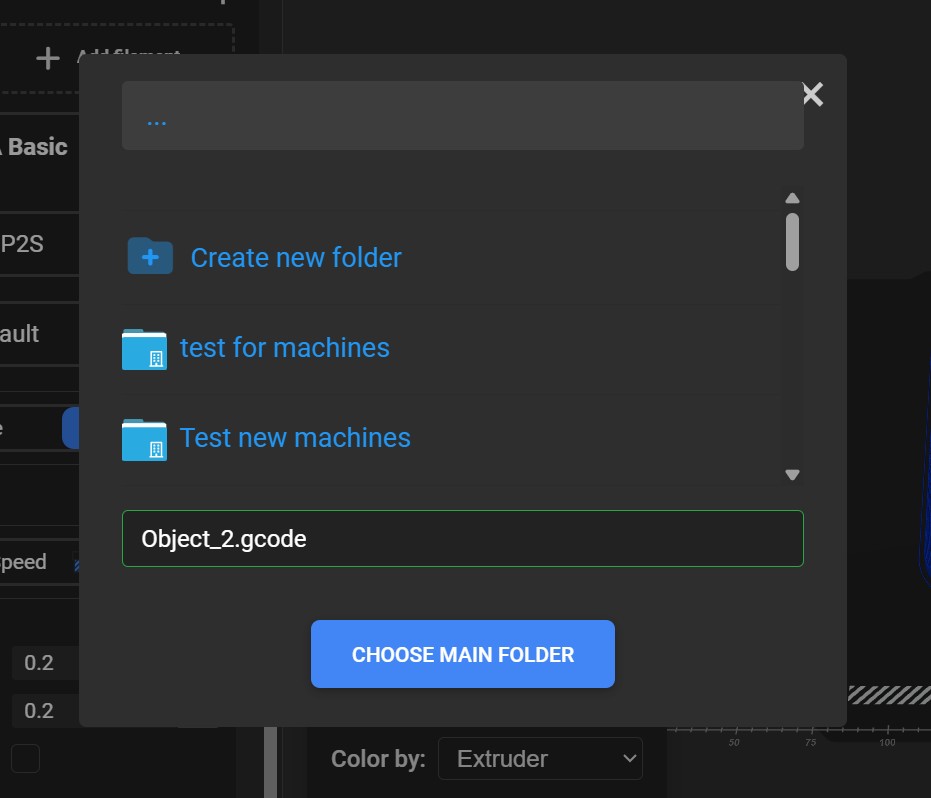
- A new window will open. Choose where you want to save the file. You will use it soon to send to a printer, so remember where you saved it. Now you have your file ready to be sent to a printer.
- Inside the 3D printer room on the 3rd floor, look for an empty printer
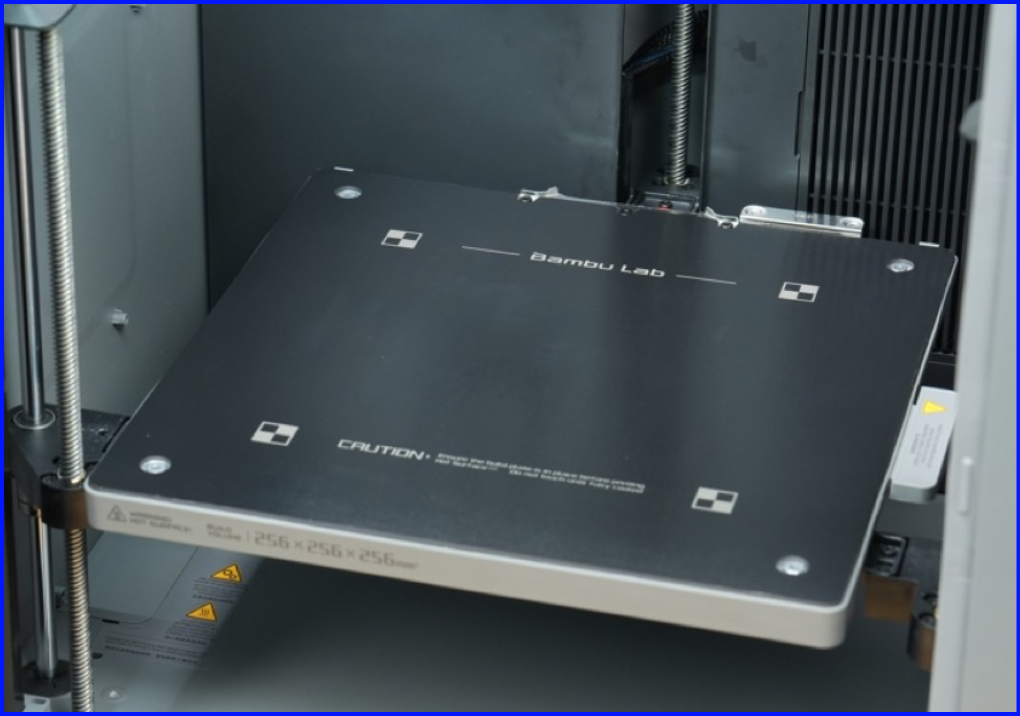
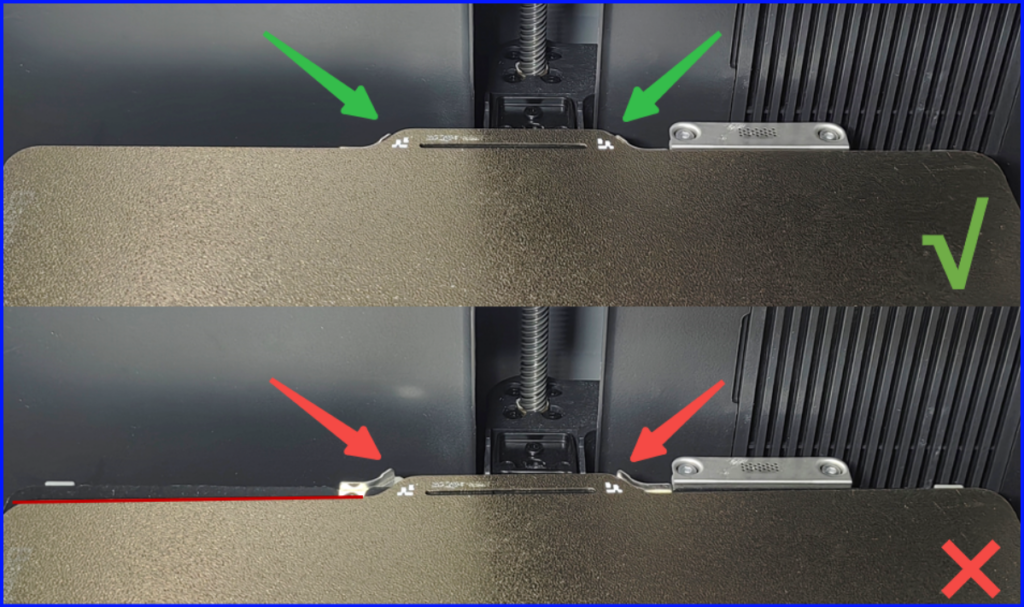
- Check for and clean any debris on the bed, then insert a clean plate. Pay attention to the right position, as if the plate is not inserted right it can damage the machine
- Now you need to ‘Load Filament’.
- But if you are using a Billable machine, please proceed to ‘Send the Job‘
- On the printer screen, press the small filament icon on the left side
- When the filament spool icon shows in the middle of the screen, press it
- Choose loading
- Follow the screen prompts
- After the screen goes back to the original view, you are ready to send your job
- Open the SimplyPrint app on your mobile phone (App or browser)
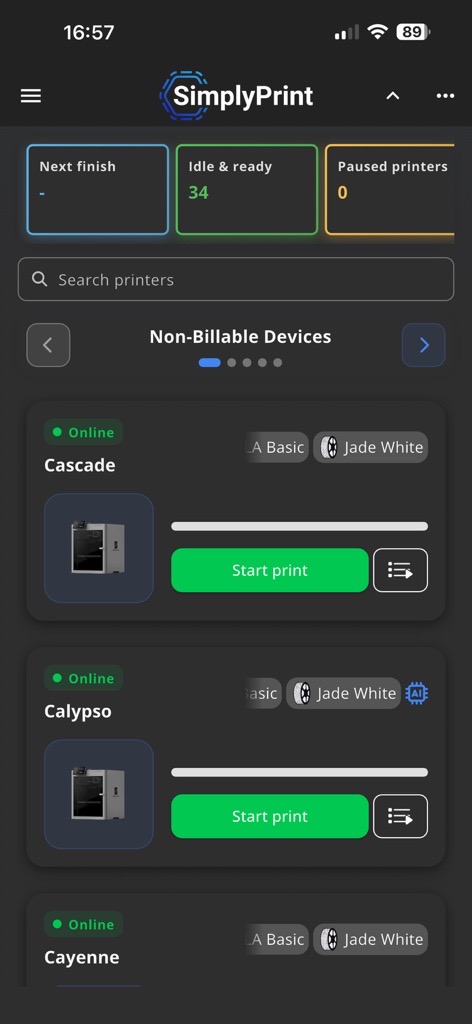
- Search the name of the machine you just prepared
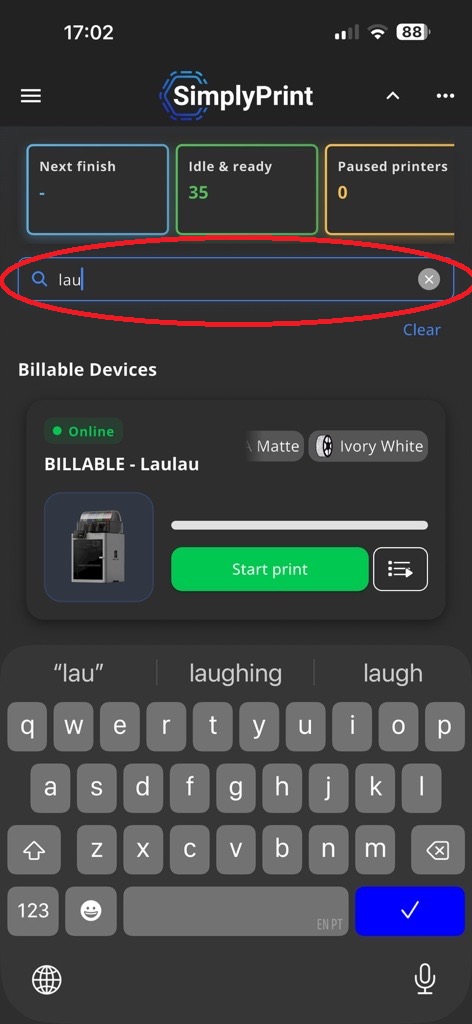
- Click on the printer image
- If needed, click on ‘print removed‘
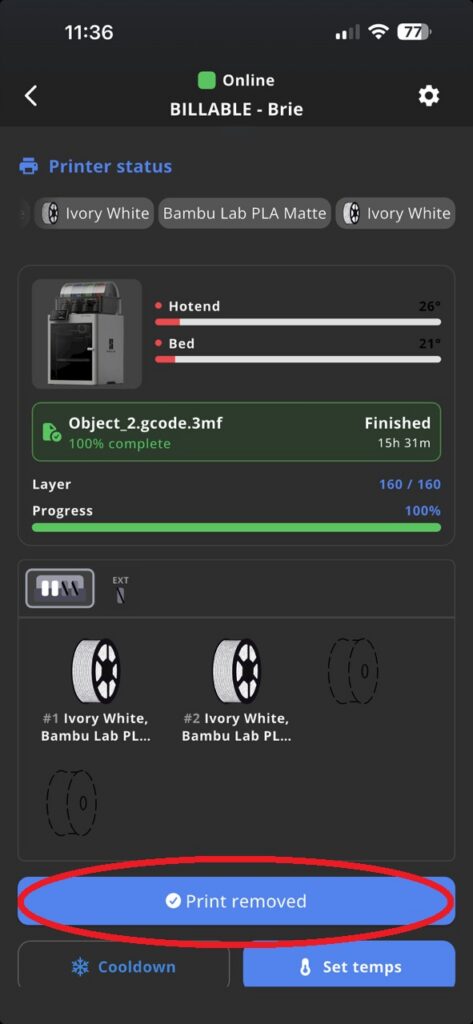
- On the camera, check the plate to ensure it is the printer you prepered (names can get confused)
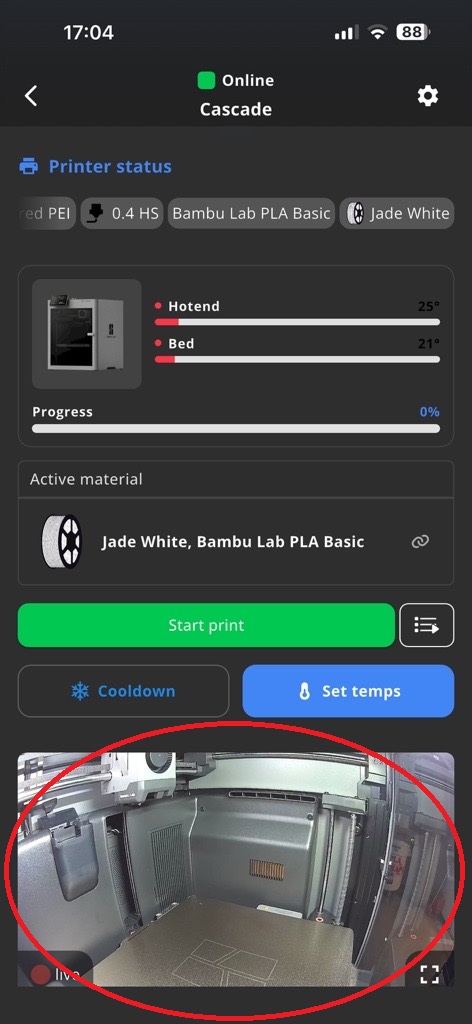
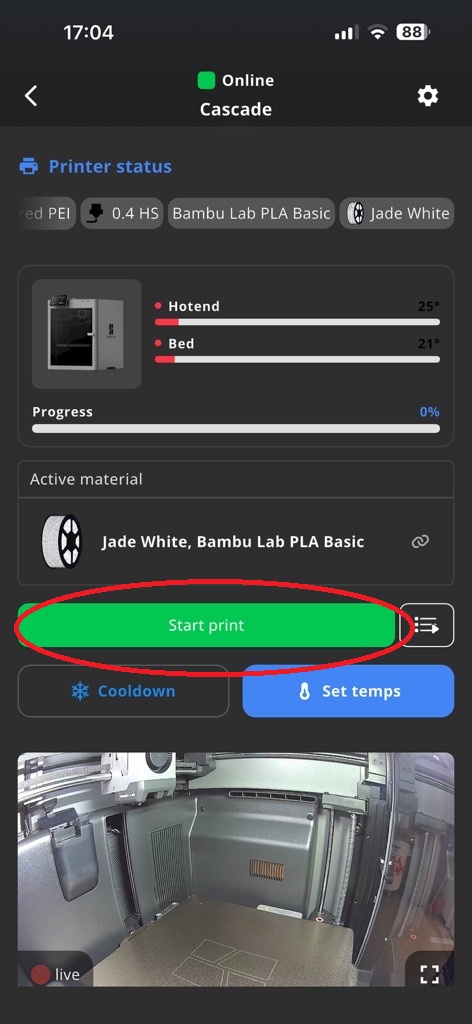
- Click on Start Print
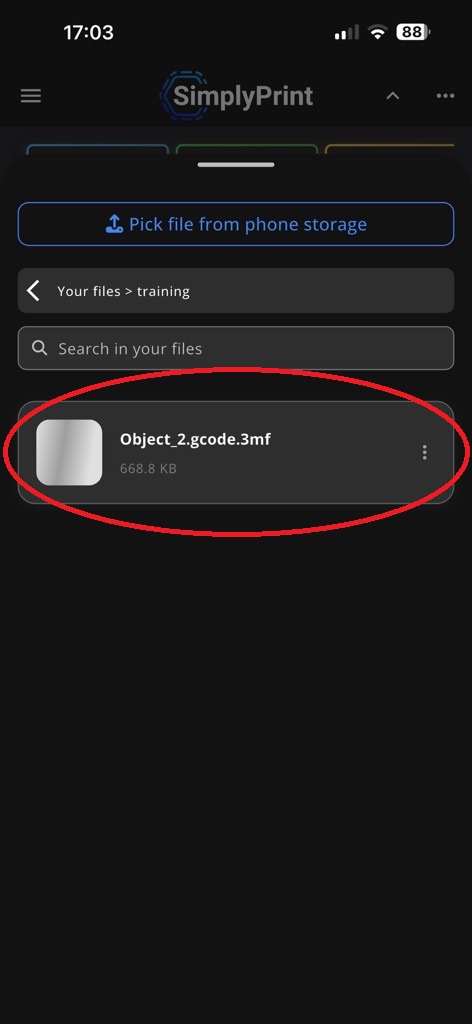
- Find and click on the file you want to print
- Confirm by clicking on ‘Choose File’
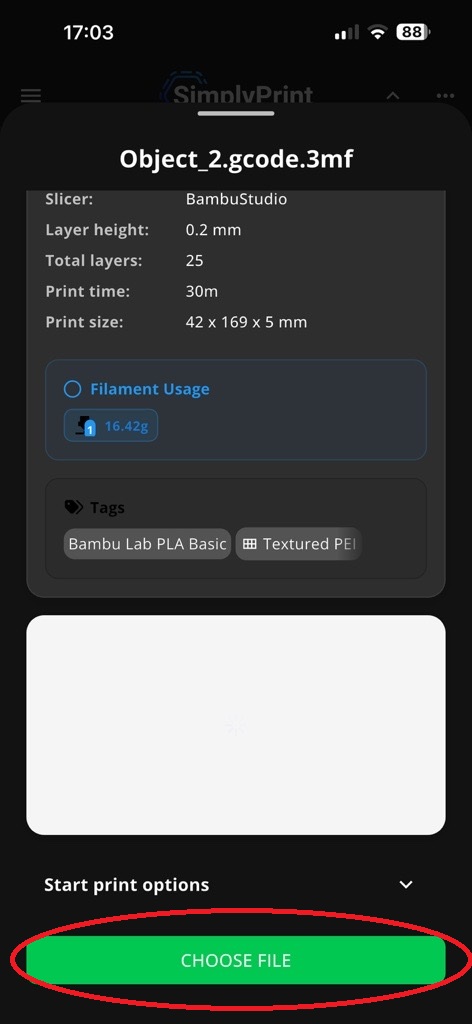
- Follow the screen prompt
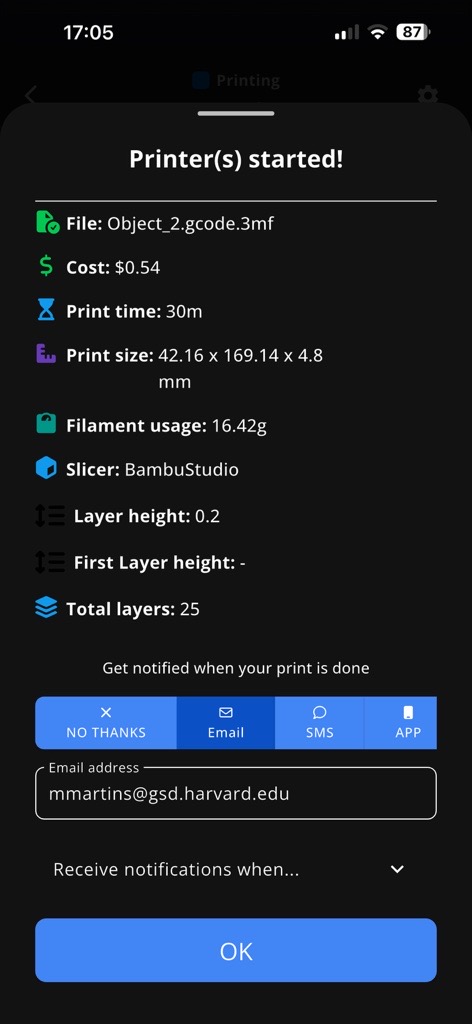
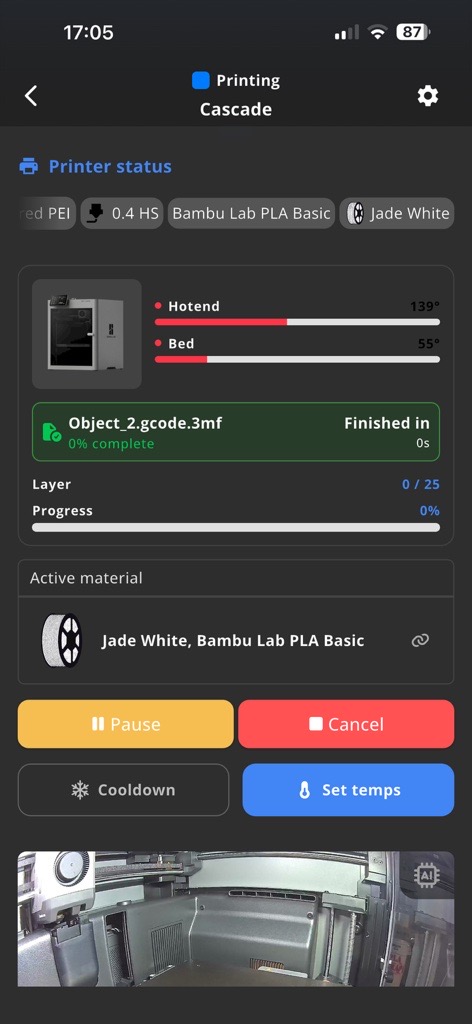
- Wait until the first few layers are printed to be sure the print starts well. The cost of parts that fail due to failure to securely adhere to the build plate will not be considered for refund.
- After that point, you can monitor the print using the camera.
- Once the part is complete, you will receive an email from SimplyPrint per the selected notification settings.
- Wait for the plate to return to room temperature before reaching into the printer.
- Gently lift the plate from the heatbed and remove it from the printer.
- Flex the plate to release the part.
- Remove any material that is still on the plate by peeling or gently scraping it with provided tools.
- If you will print more parts immediately, replace the plate in the machine. Otherwise, if you used a plate provided by the Fabrication Lab, place the plate in the dirty bin on the wire rack. Plates provided by the Fabrication Lab must not leave the room.
- Remove support structures if necessary. You can use the wood table close to the glass wall to do it safely.
- All PLA that is unpainted and unglued can be discarded in specially-marked waste bins, for filament recycling.
- If you used a non-billable printer, unload your filament from the machine before leaving the room.
Unload Filament
- From the printer’s touchscreen, open the filament menu and select ‘UNLOAD’
- The printer will first heat the nozzle: this is an important step because filament can’t be removed safely until it is softened in the hotend; wait until attempting to remove the filament.
- Once prompted on the touchscreen, gently pull the filament straight back from the PTFE tube, turning the spool to the same side so the filament does not get loose.
- You should only feel light resistance
- Avoid twisting or pulling aggressively, as this can damage the filament path or leave material inside the hotend.
- If you’re finished using the printer, store the filament properly to avoid moisture absorption. A sealable air-tight bag and desiccant are recommended.
- Keep the workspace organized for the next user.
Other Methods
For users more comfortable using other slicers or methods of generating gcode, please see the other references included on the 3D printing tutorials page.
The Fabrication Lab is intended for the use of the faculty, staff, and students enrolled in courses at the Graduate School of Design pursuing academic work. Please see our Policies page for more information.