
Table of Contents
Settings and steps to cut and engrave from Adobe Illustrator. These are abbreviated instructions that apply the basic workflow to Adobe Illustrator, so other tutorials may need to be consulted.
Color Mode
Set Document Color Mode to RGB from the File menu.
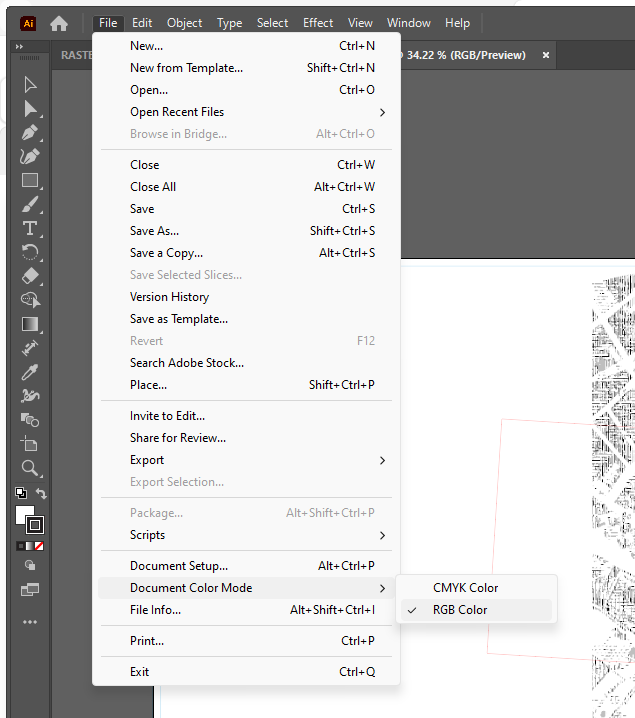
This will allow you to ensure that all entity colors are able to be set to RGB values which the Universal Laser System driver recognizes. CMKY values may not be recognized and so may be skipped when printing the file to send to the Laser Cutter’s UCP.
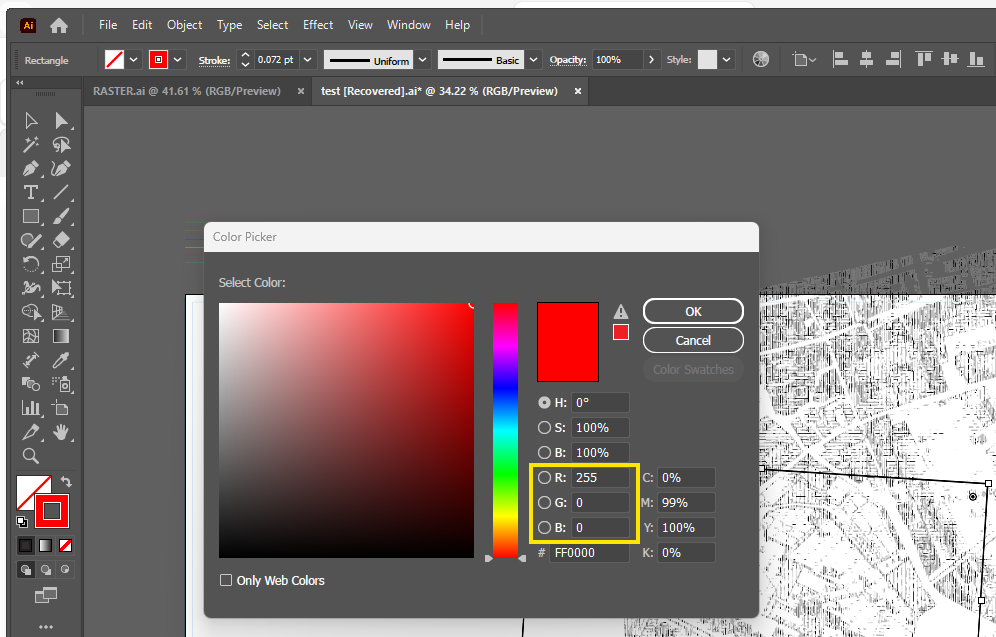
Refer to this table of recognized colors and their corresponding RGB values:
| Color Name | R | G | B |
| Red | 255 | 0 | 0 |
| Green | 0 | 255 | 0 |
| Blue | 0 | 0 | 255 |
| Cyan | 0 | 255 | 255 |
| Magenta | 255 | 0 | 255 |
| Yellow | 255 | 255 | 0 |
| Black | 255 | 255 | 255 |
| Orange | 255 | 0 | 0 |
Vector Objects
All objects you’d like to treat as VECT, with either through-cut or etching settings, must have a stroke of the lightest weight, 0.072 pt.
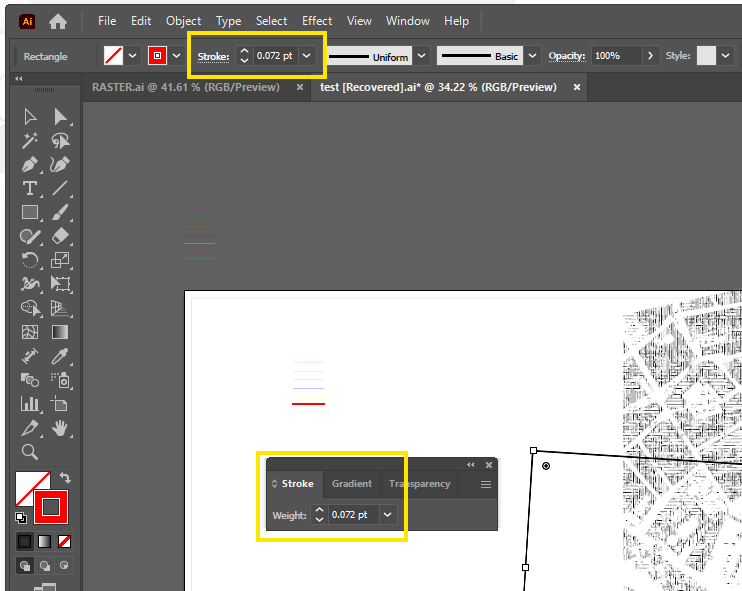
Objects such as paths or shapes with no fill that have a stroke weight heavier than 0.072 pt will be considered raster objects and so may be skipped if their corresponding color is set to VECT in the ULS printer settings.
Raster Objects
Colors set to RAST in the ULS printer settings will always be run by the laser cutter before any VECT colors’ objects, regardless of the order the colors appear in the ULS settings.
Any path or shape that has a weight or fill can be set to RAST for corresponding etching treatment. Paths with light stroke weights, and similarly narrow or small raster entities may not be engraved as continuous shapes, appearing dashed or disconnected.
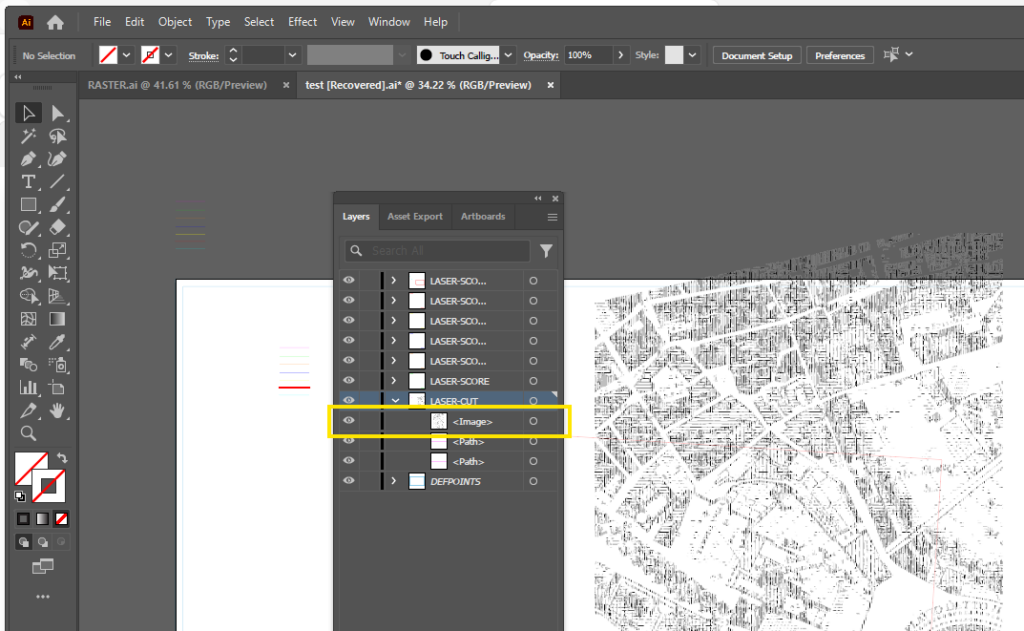
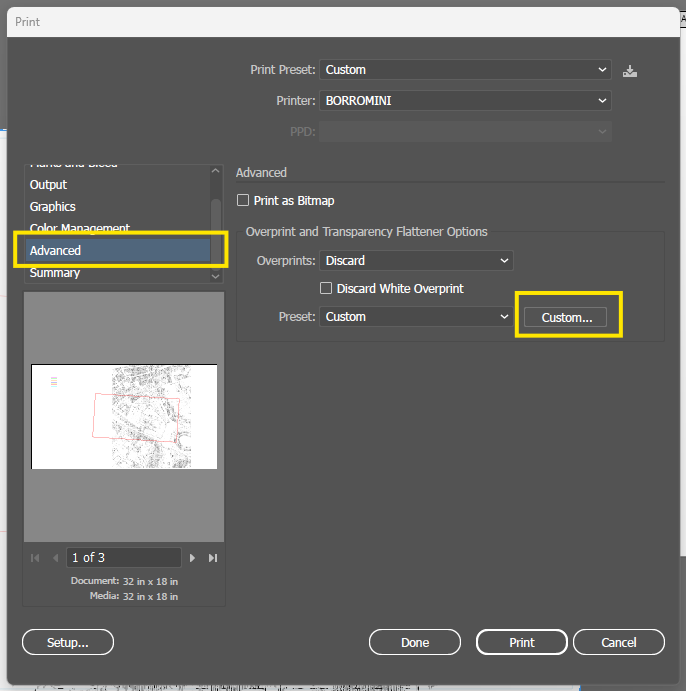
Any entity appearing as <image> in the Layers manager that remains visible at time that “Print” is selected, will cause all vectors to be treated as raster unless an Advanced setting is set to 100 in the print dialog. (See the “Last Step” in Print Settings, below, for more details on this.)
Artboards
To avoid placement issues when printing, place all work you intend to laser cut or engrave within an Artboard that is 32″ wide and 18″ tall.
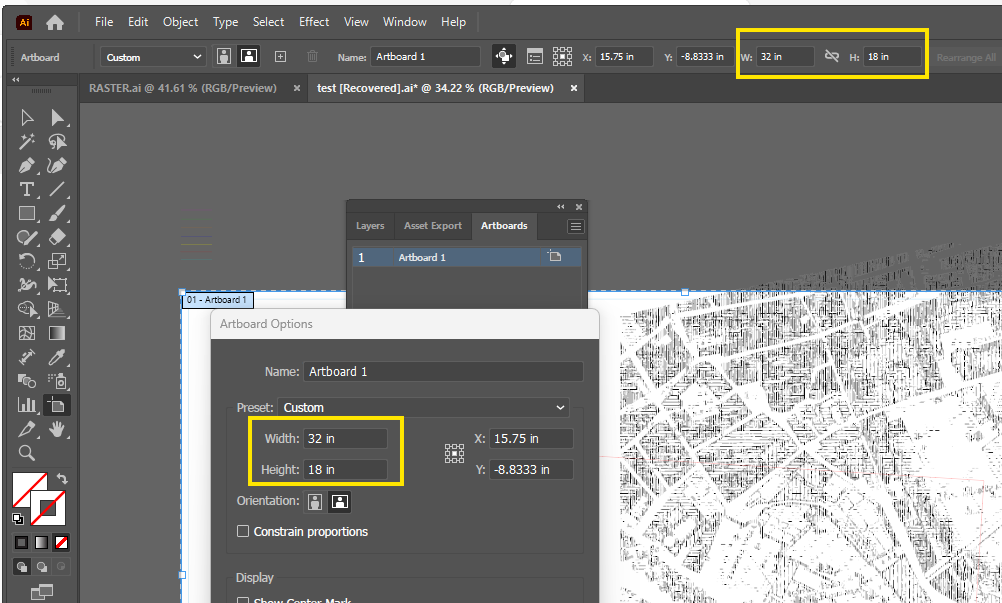
If using more than one Artboard, make note of the number of the Artboard that corresponds to the setup for Laser Cutting/Engraving.
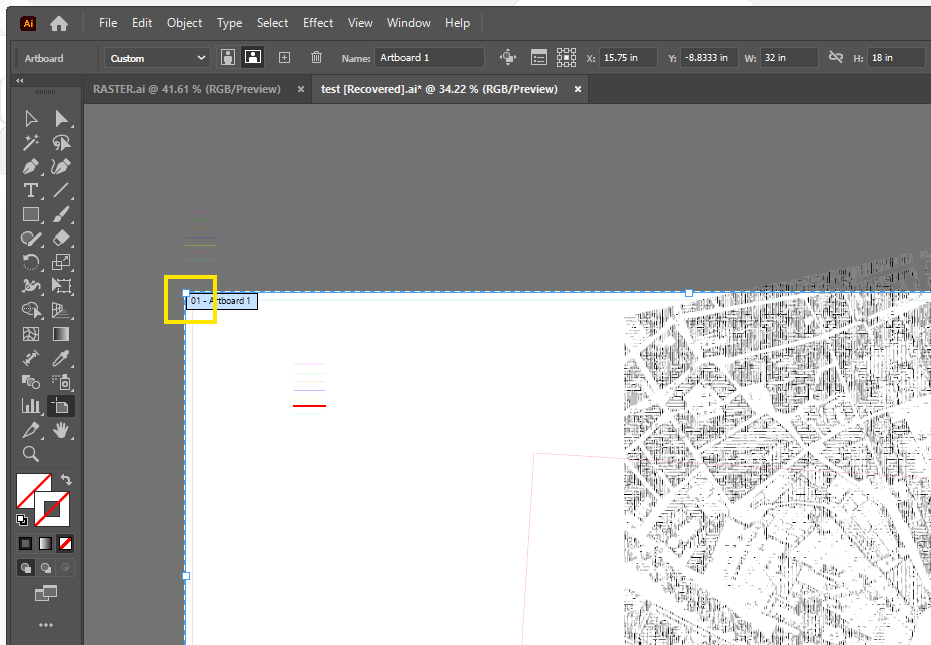
As necessary, deselect the option to move artwork with the Artboard, when positioning the Artboard.

If the media you are cutting is smaller than 32″ x 18″, it’s often helpful to draw its extents as a path around the objects you do intend to cut, so that you have a better sense of where the cuts will be within the media. Include that path in a separate layer that is not set to print. This helps to align the media to the Artboard and then to the edges of the cutting table in the laser cutter, to map the file’s (0,0) to the machine’s (0,0) and better predict where the cutting and engraving will take place on the media.
Print Settings
Make sure all layers you intend to laser cut or engrave are set to be Printable, and include only Printable and Visible layers in the Print Dialog.
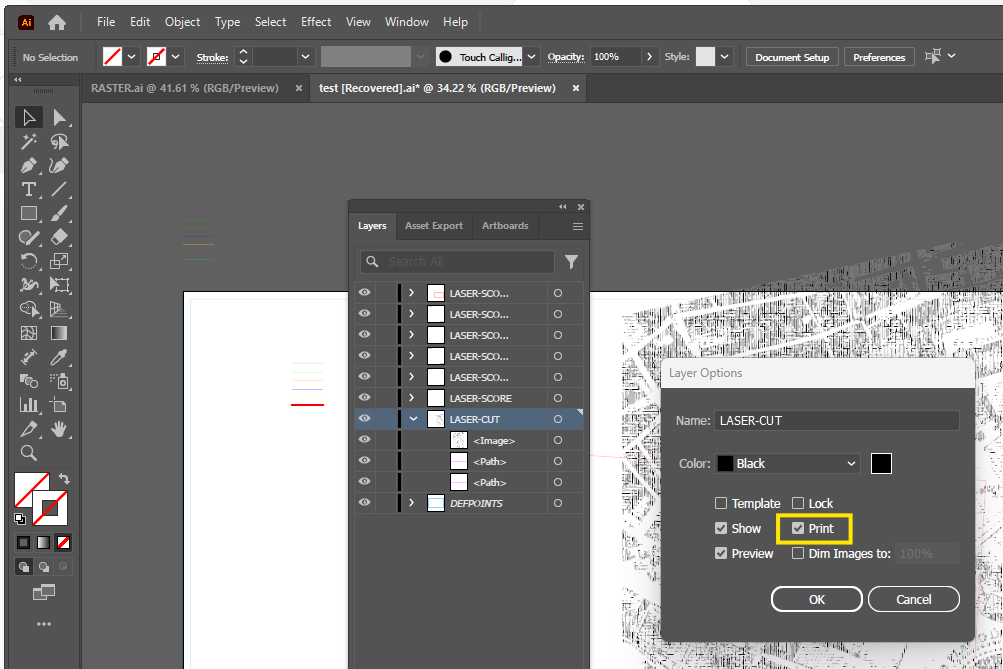
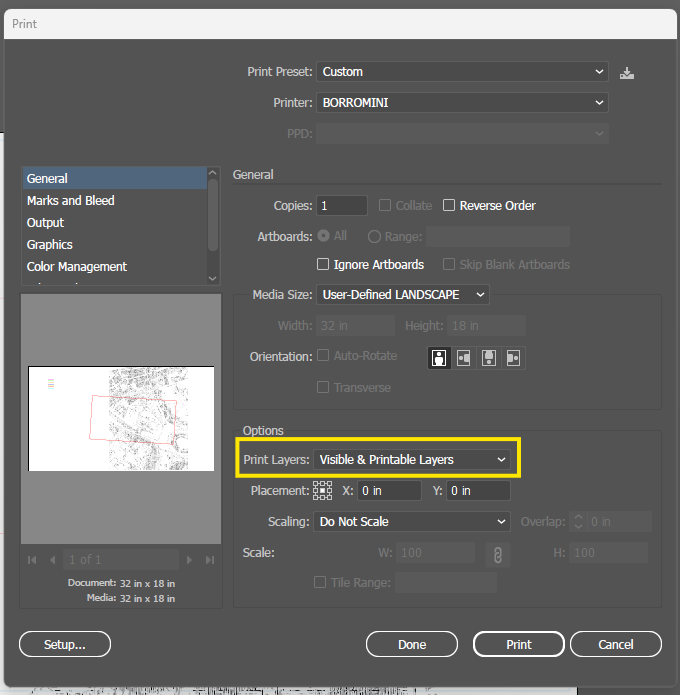
If using multiple Artboards, select the Artboard you intend to use to print, else move the Artboard to surround the work that you intend to print.
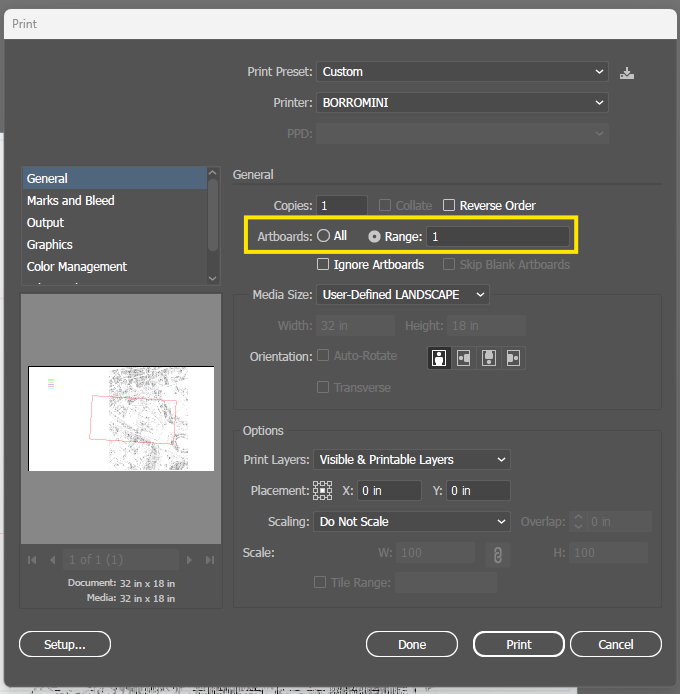
Next, choose “Setup…” to indicate how to treat the entities’ colors.
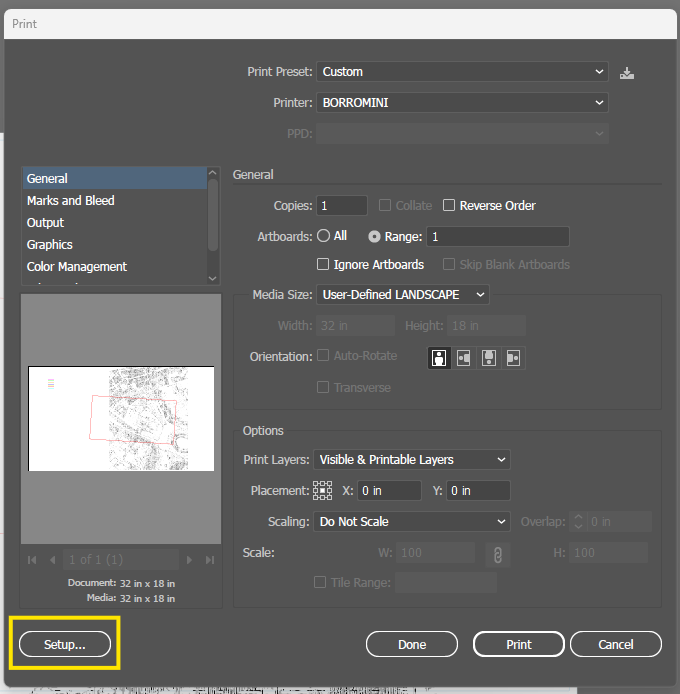
If this is not done through Illustrator, some colors may be skipped or treated as RAST or VECT unintentionally and you will not be able to change those settings in the UCP.
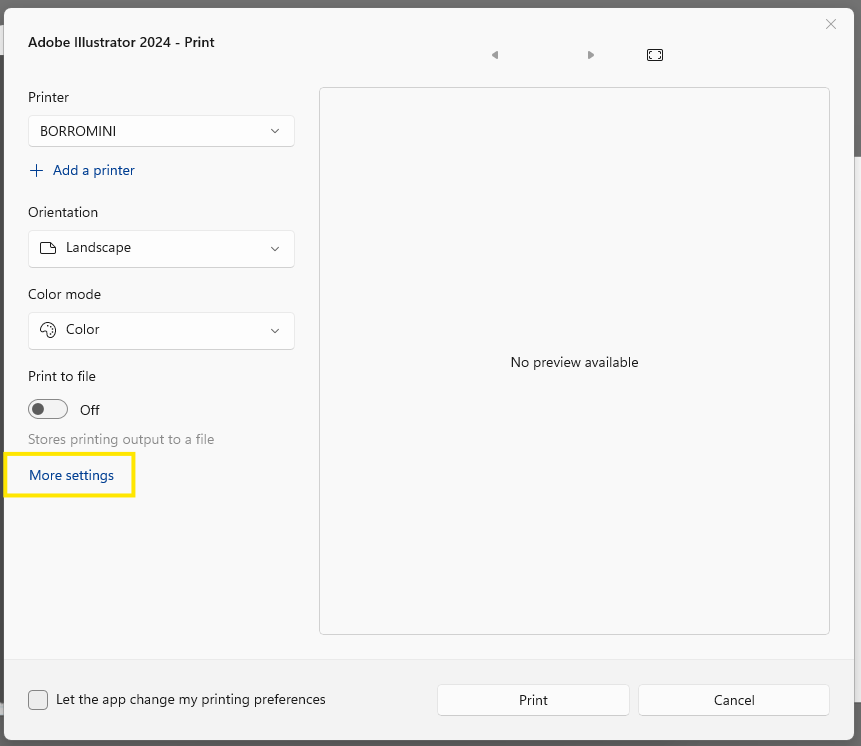
A pop-up may appear, select “Continue”, then a new dialog will appear, select “More settings”.
Under the “Manual Control” tab, assign VECT and RAST and other settings as appropriate.
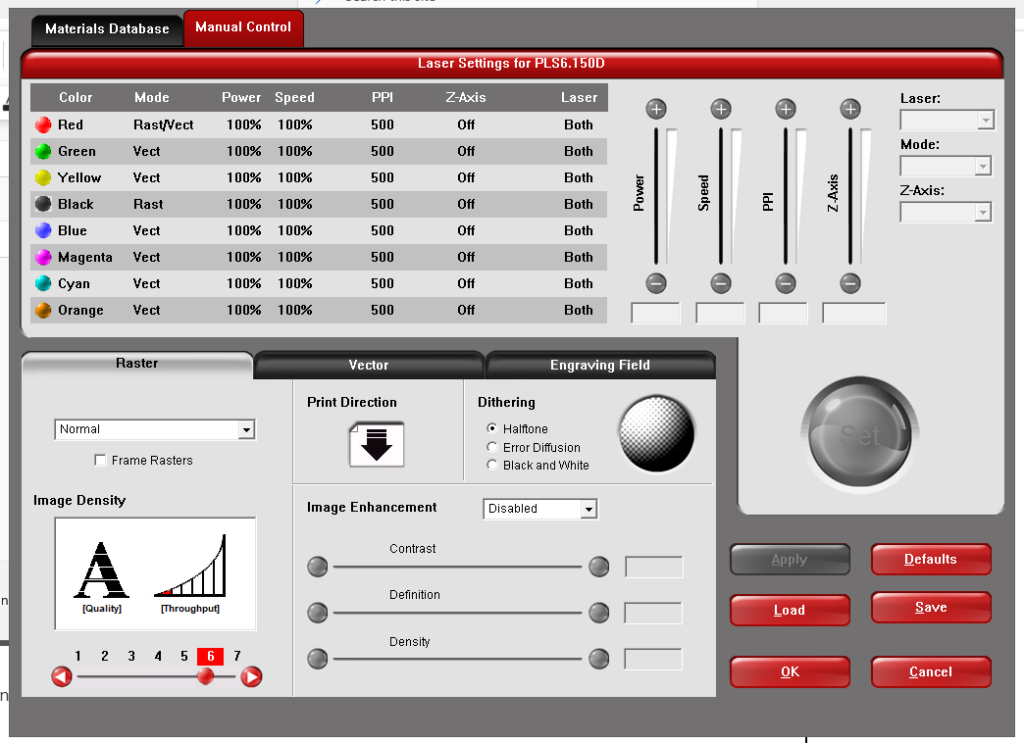
And then confirm all settings and hit “Print”.
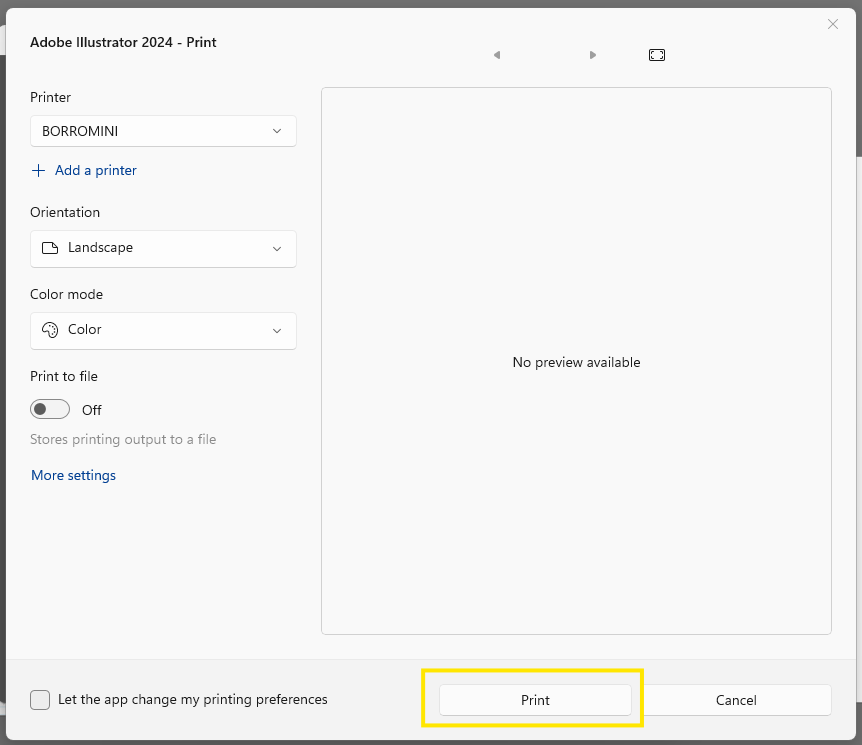
Doing this should return you to the Illustrator Print settings, but will likely have changed the Media Size and Orientation, so set that now, to “User-Defined LANDSCAPE”, and Portrait:
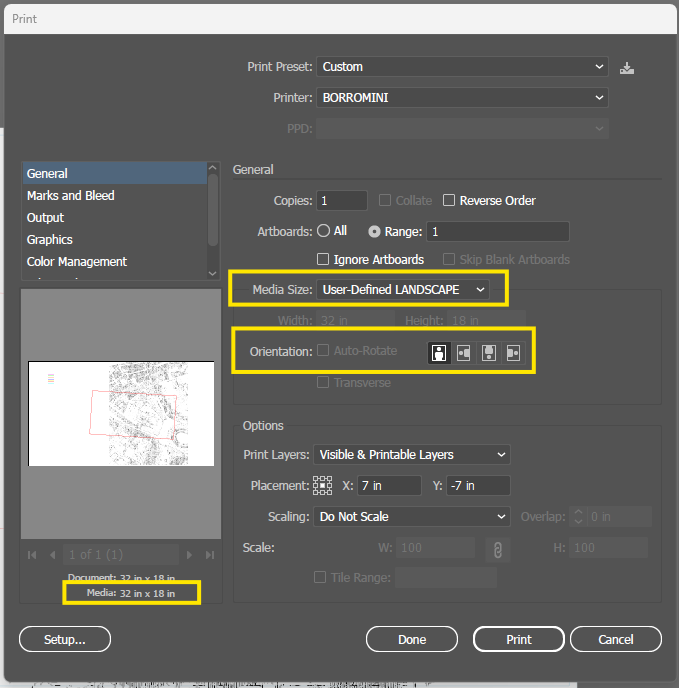
Last Step!! If your file has any <image> objects visible (such as a fill pattern that was rasterized, or a placed image) AND you intend to cut or score any number of vector entities, then navigate to the “Advanced” settings and select “Custom”:
Slide the scale to 100 to balance towards Vector output.
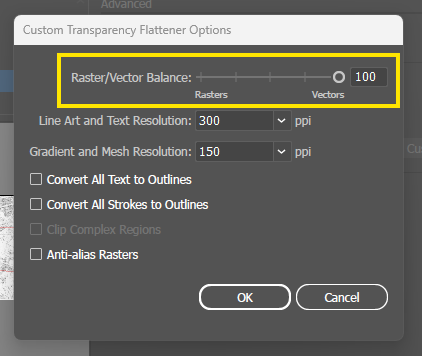
Without doing this, all objects, regardless of their weight, will be treated as raster entities, and so will be skipped if the ULS printer settings specify VECT for their associated color.
Select OK and then Print to proceed through PaperCut authorization and into the UCP to start cutting/engraving.
The Fabrication Lab is intended for the use of the faculty, staff, and students enrolled in courses at the Graduate School of Design pursuing academic work. Please see our Policies page for more information.