This application of the Zünd cutter is intended for aluminum, copper, and other non-ferrous metals, metal-faced plastic sheet materials, and plastic boards that are not safe to laser-cut. Routing wood products is generally best handled with the CNC router.
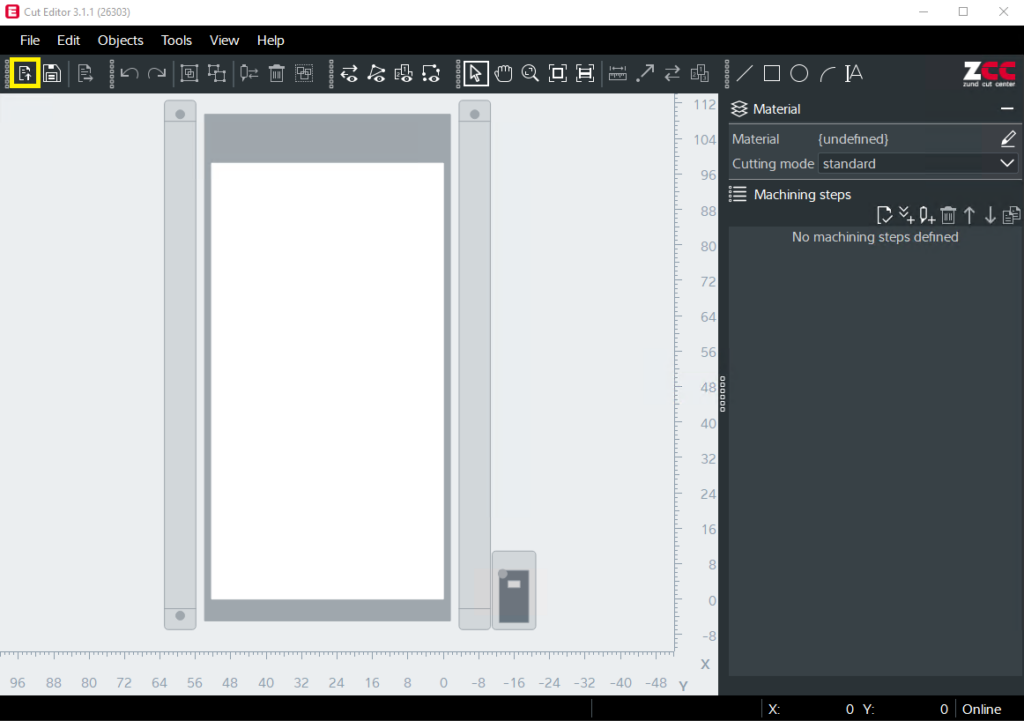
Open Cut Editor, Import Illustrator File
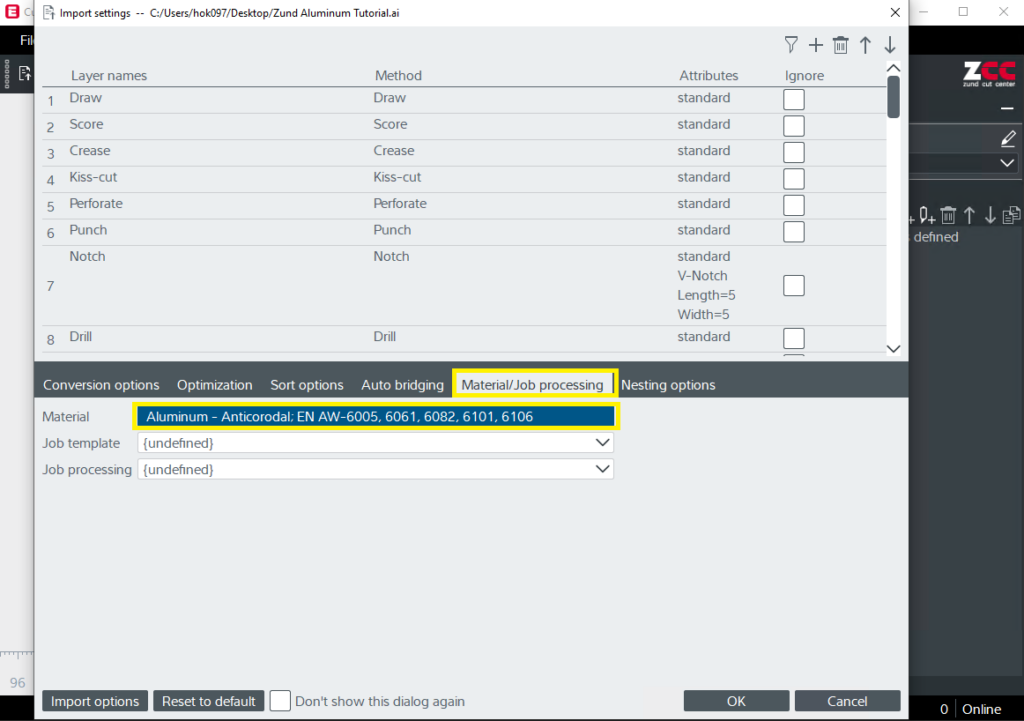
Go to Material/Job processing tab, and select material.
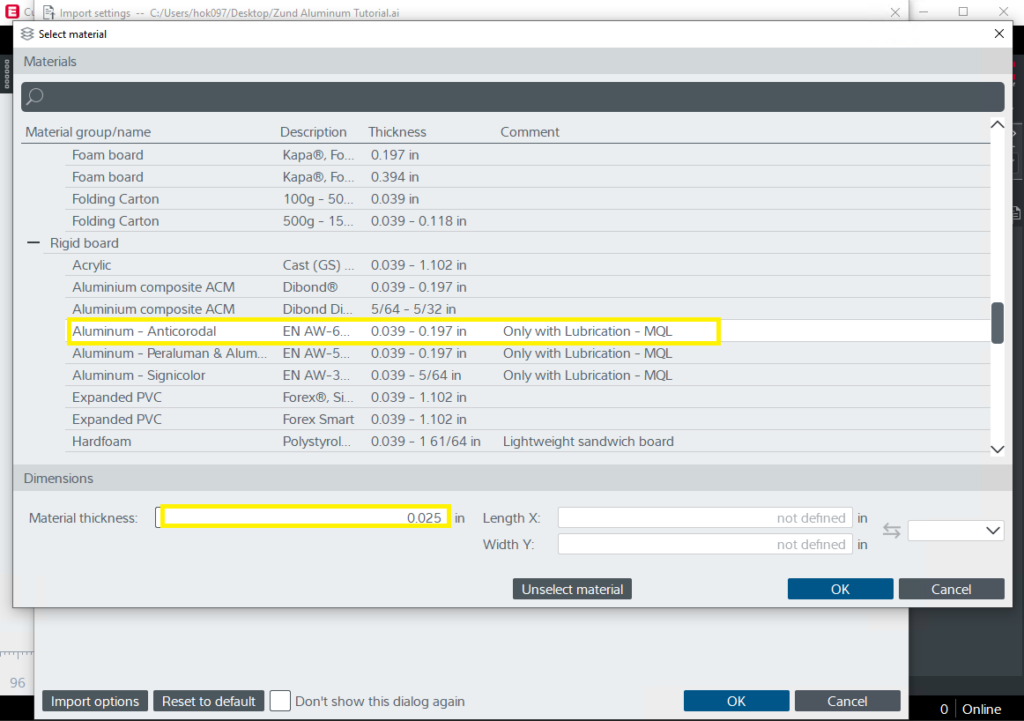
Select Material, input Material Thickness
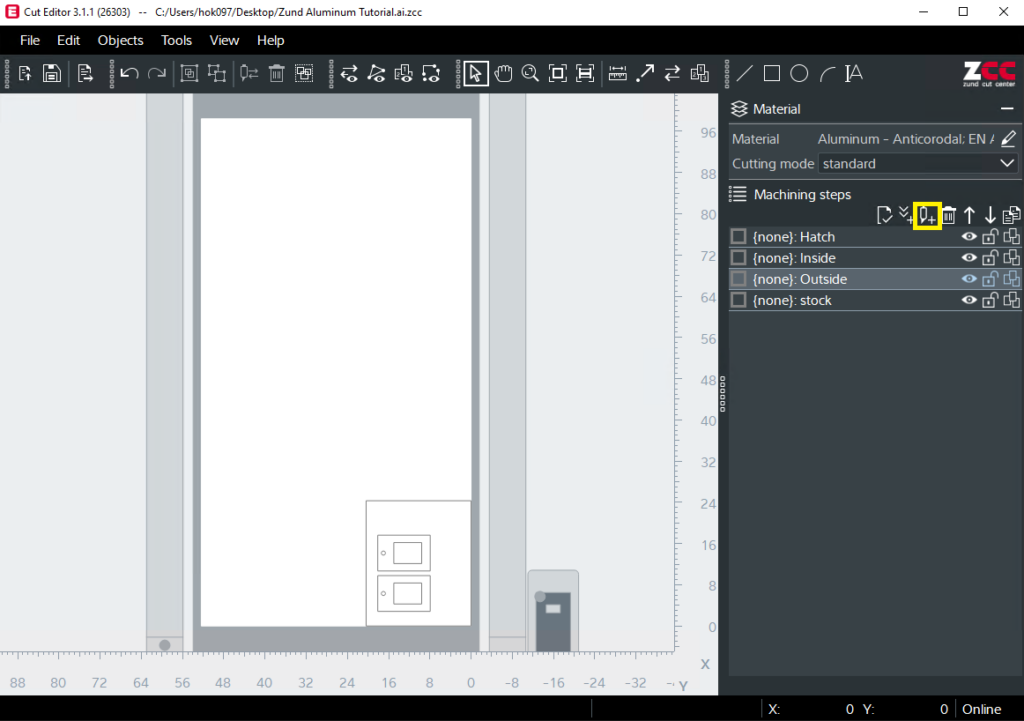
Click the “add method” button for adding registration layer
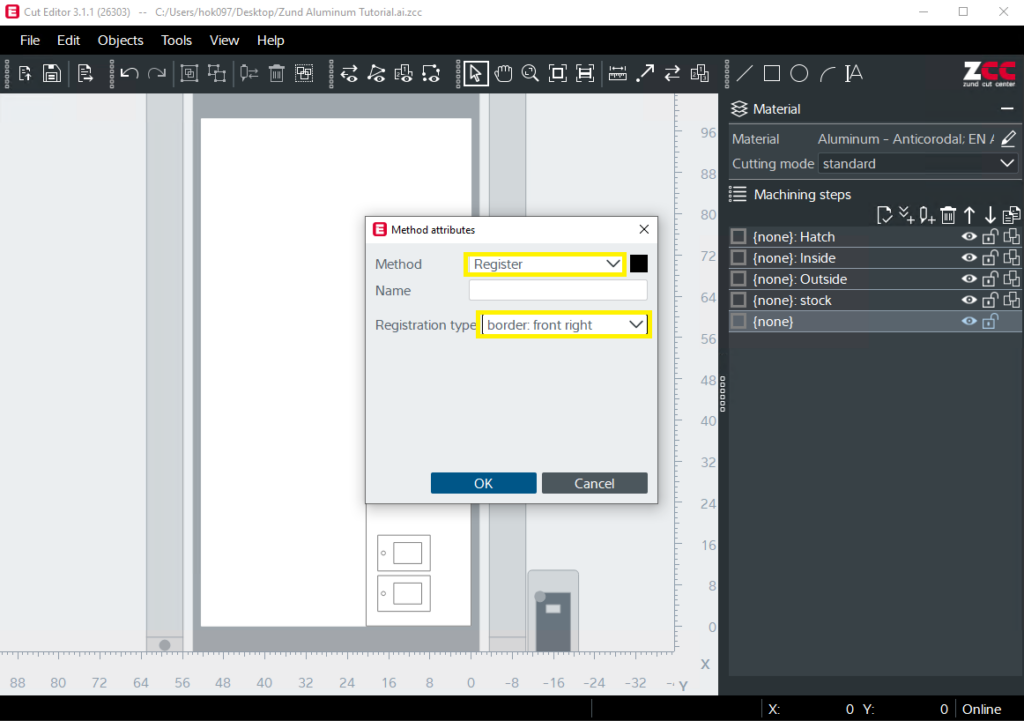
Choose “Register” as method and “border:front right” as registration type
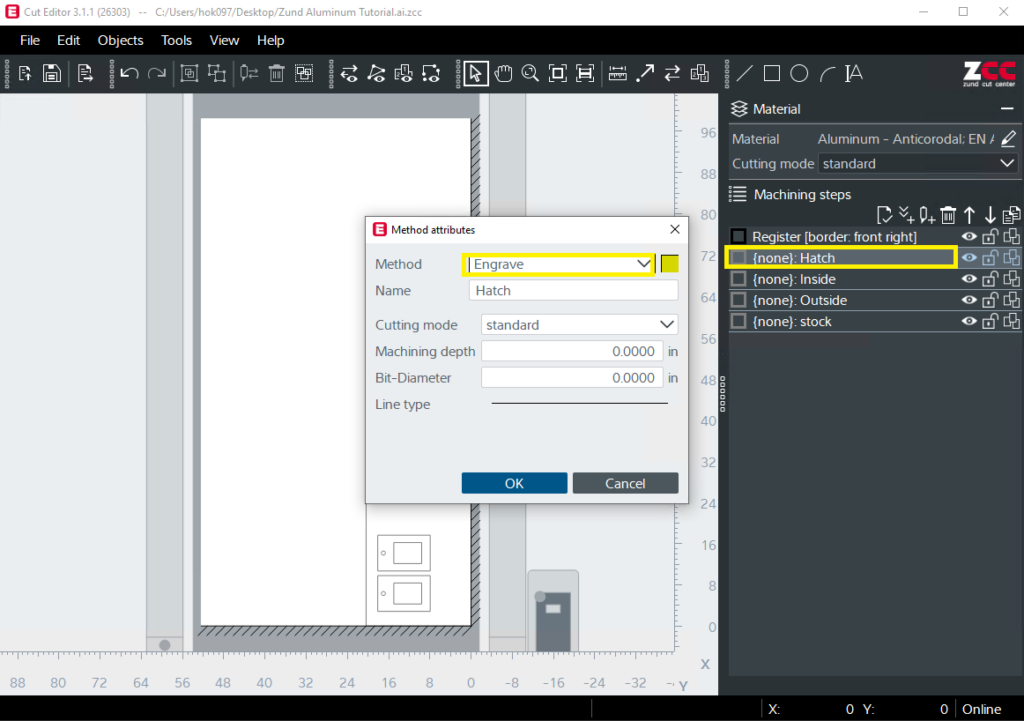
Double Click layer name, and assign method for each layer.
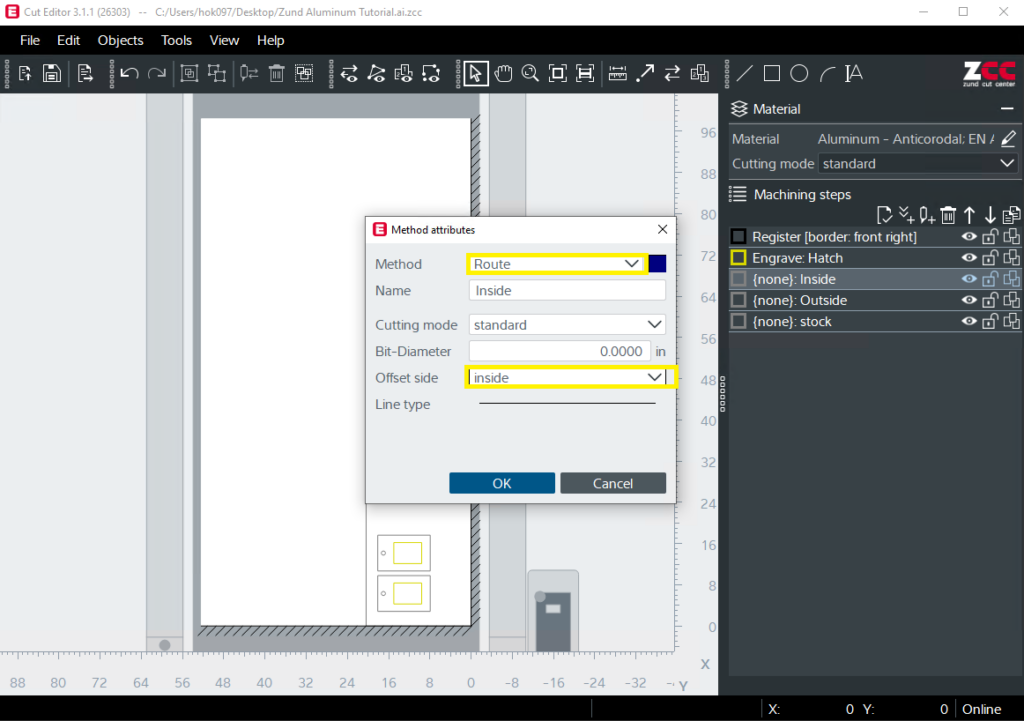
Select “Route” for geometry. Choose “inside” as offset side for the tool to stay inside the geometry.
*Note: Interior corners will maintain the radius of the bit. There is no way to maintain a 90-degree sharp angle for interior corners; please design the cut accordingly.
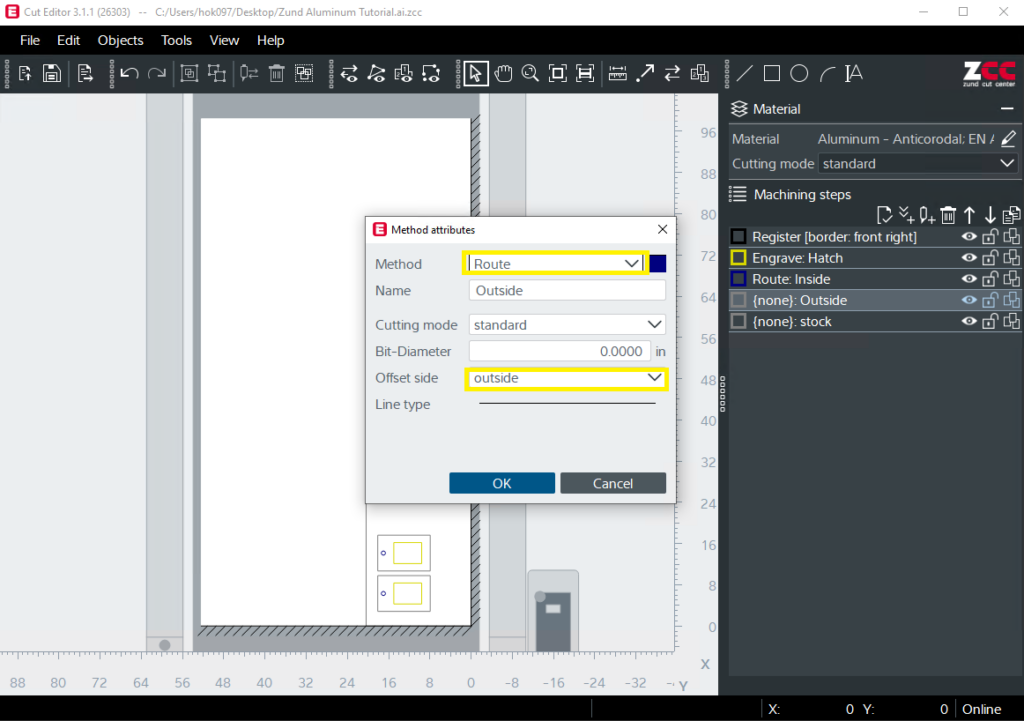
Select “Route” for cut geometry. Choose “outside” as offset side for the tool to stay outside the geometry.
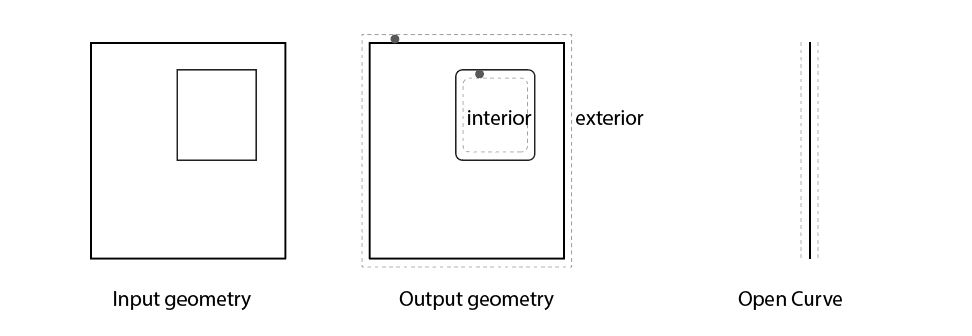
Note that the RMA treats closed curves and open curves differently. For closed curve, the “route” function will cause the bit to cut along either the inside or the outside of of the curve, “on center” is not an option.
For open curves, the router bit will operate down the center of the input geometry only if using the “engrave” method.
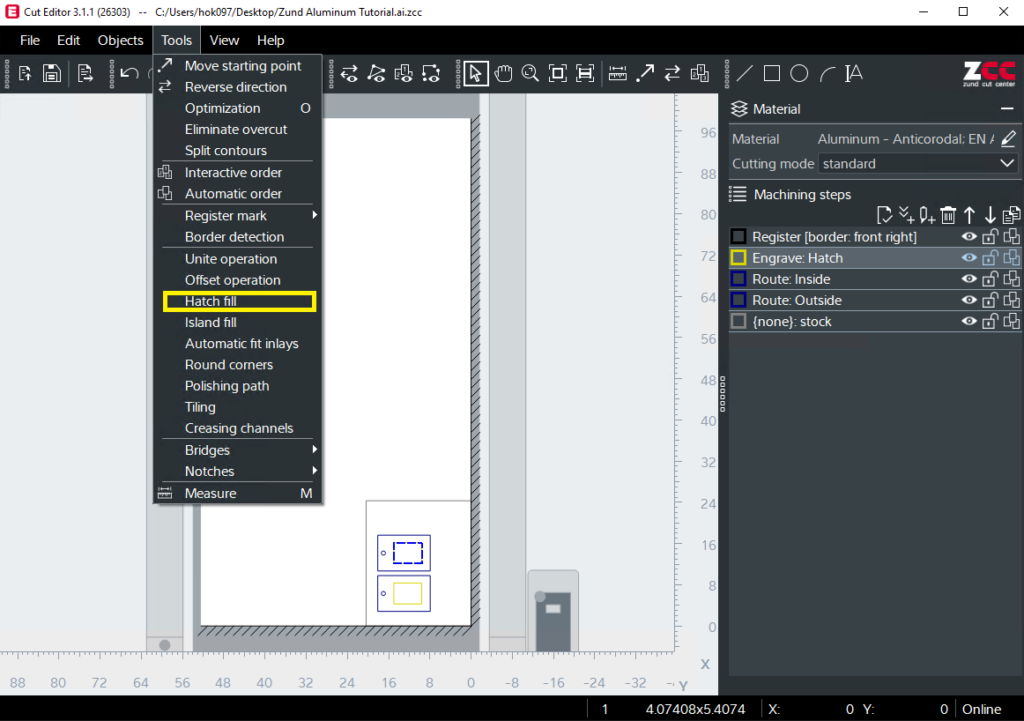
Select geometry that needs to be engraved.
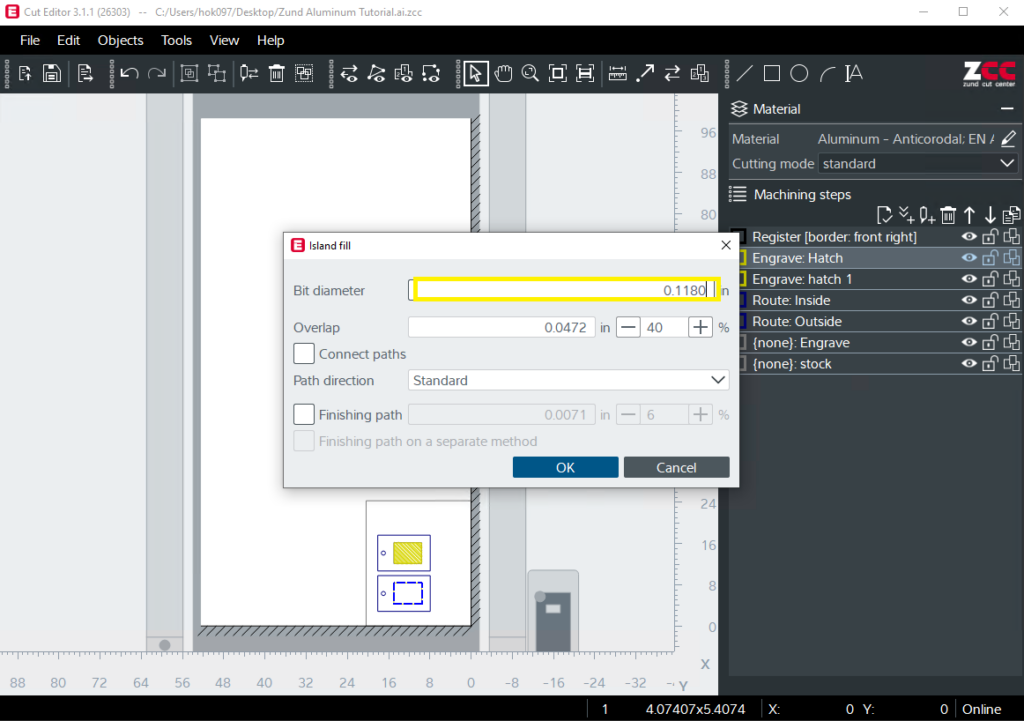
Go to Tools>Hatch fill/Island fill. This tool allows you to carve-out an area of engraving enclosed by the curve (instead of just following the outline of of the curve) by either moving back-and-forth (hatch fill) or in concentric shapes (island fill).
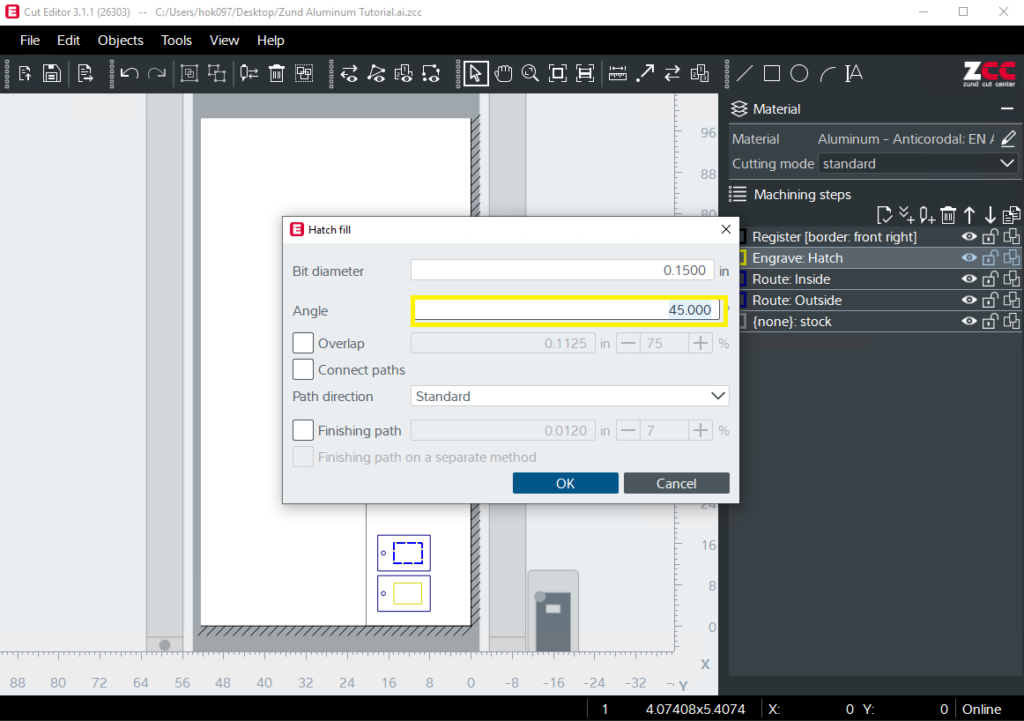
For Hatch fill, define bit diameter and pattern angle.
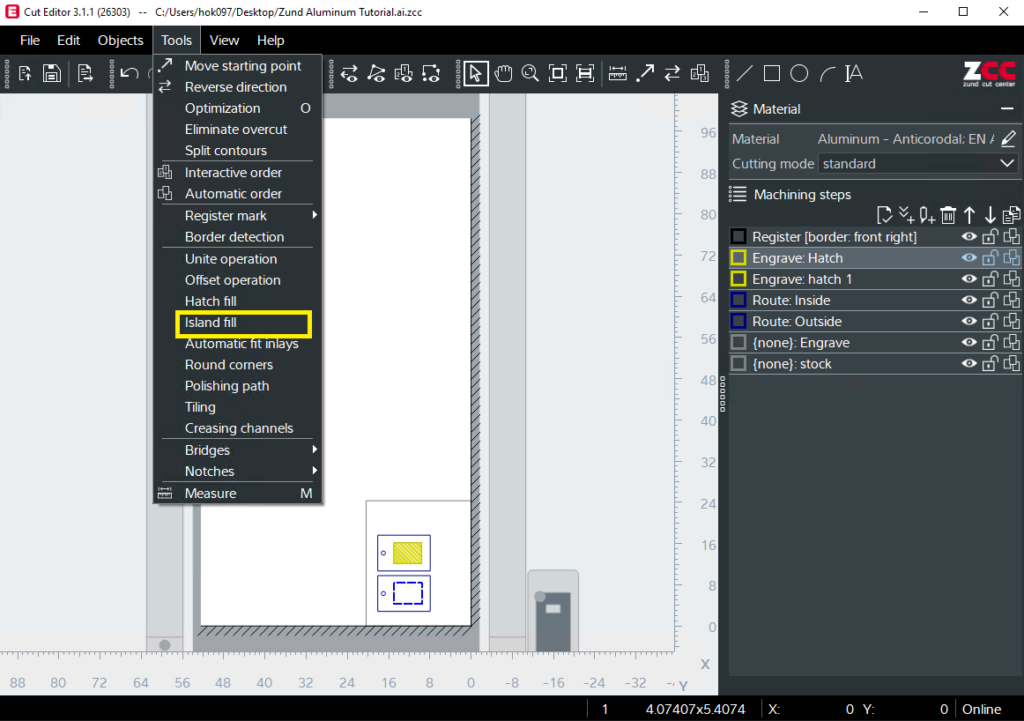
For Island fill, define bit diameter and percent overlap of the pattern.
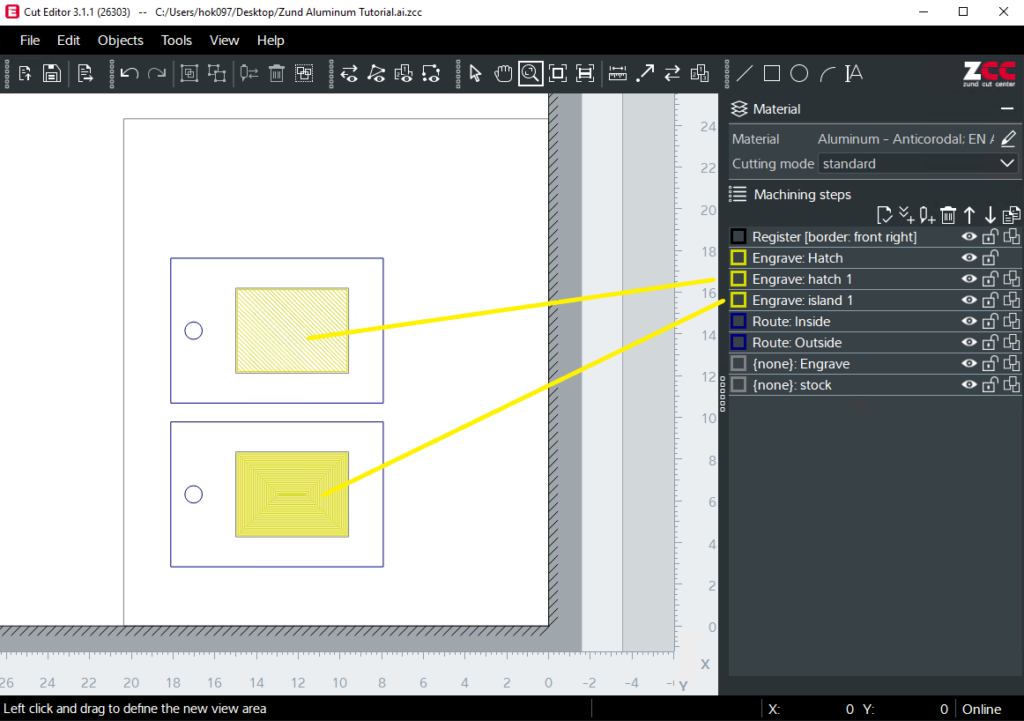
Make sure the layers are in a good order. Register, then Engrave, then Route-inside, and finally Route-outside.
Related: Rectangular Board File Setup (Rectangular Registration), Printed Board File Setup (Registration Dot)
