For printed media, 1/4″ black dots (registration marks) can be used to align the printed graphics with cutting and other operations performed by the Zünd. Instead of the camera on the Zünd locating the edges of the media, it can be setup to find the printed registration marks.
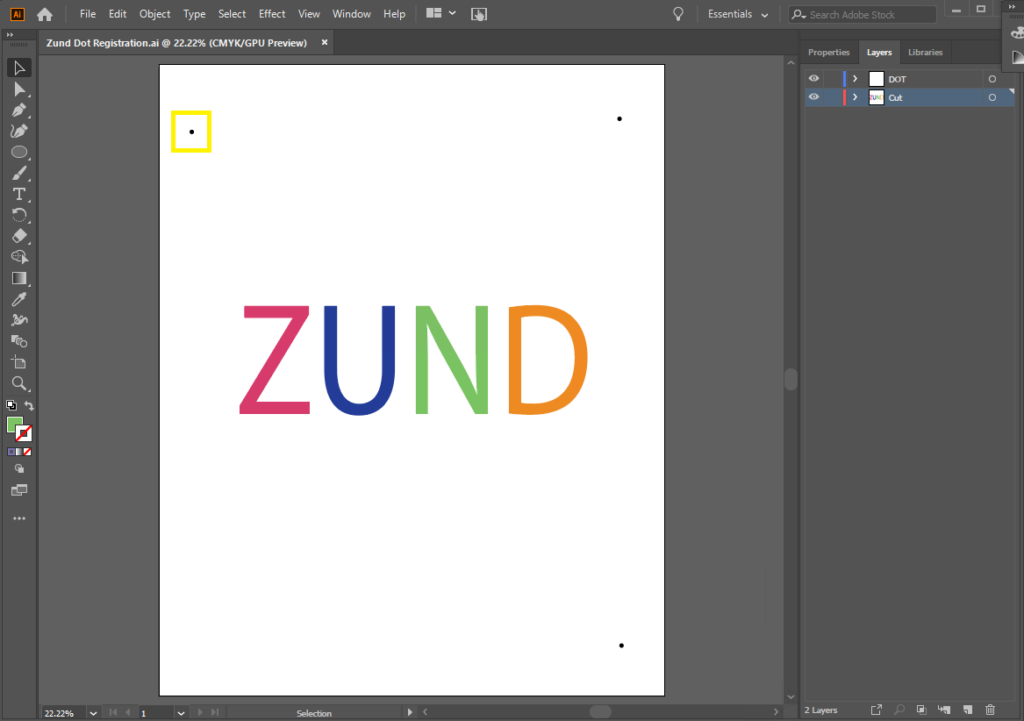
In Adobe Illustrator, create (suggested) three black circles with 1/4″ diameter as registration point. Place them at three different corner on the paper. Make sure the place the dots outside the saved area that will be cut out by the Zünd.
The Zünd Editor will only read the vector information for from the AI file, so please make sure to create vector outline of the geometry you wish to cut.
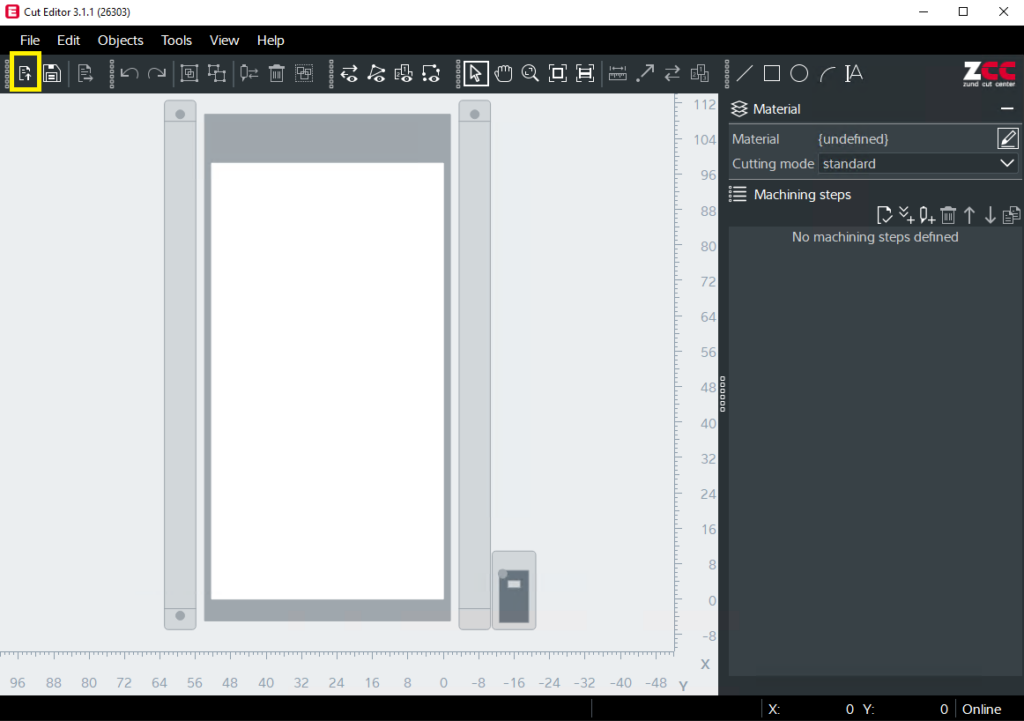
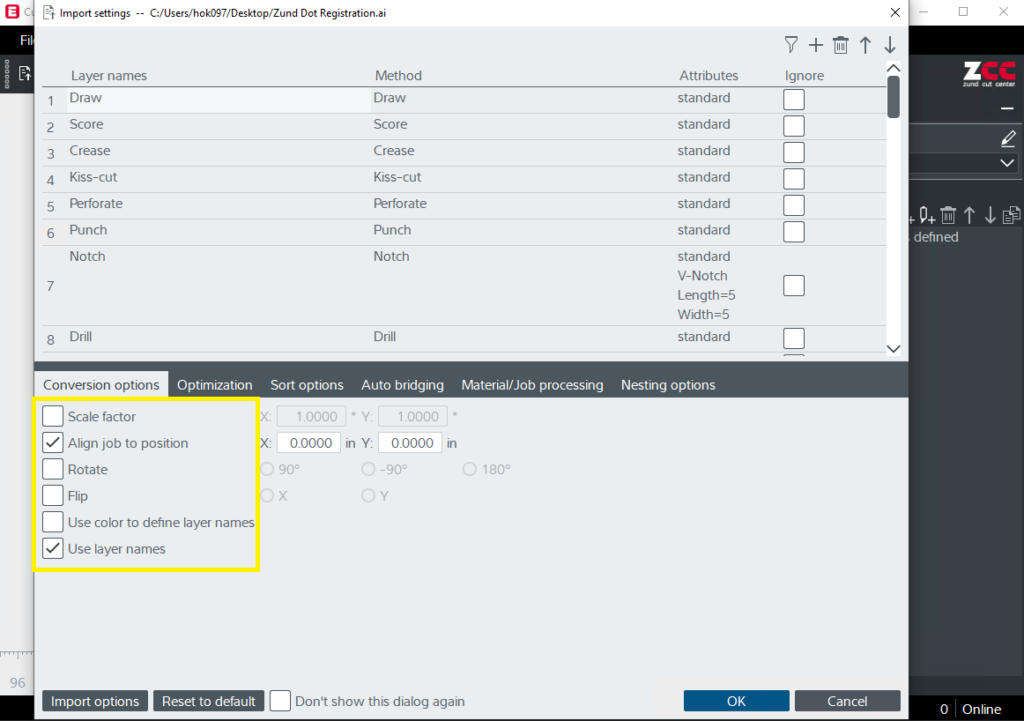
Open Cut Editor, Import Adobe Illustrator File
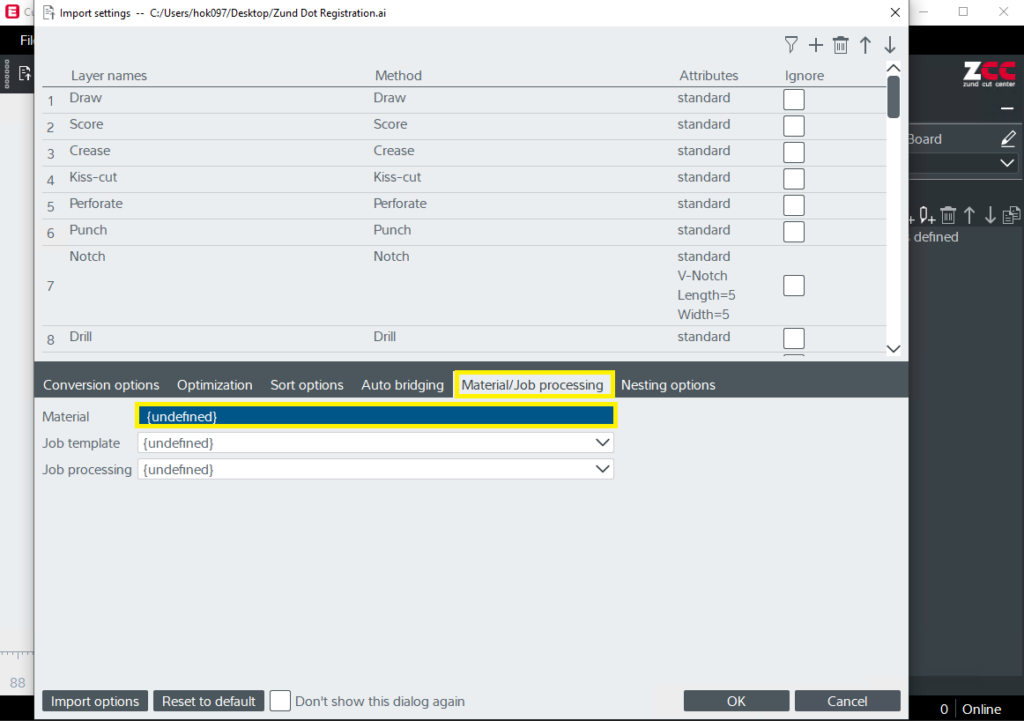
Go to the Material/Job processing tab and choose material.
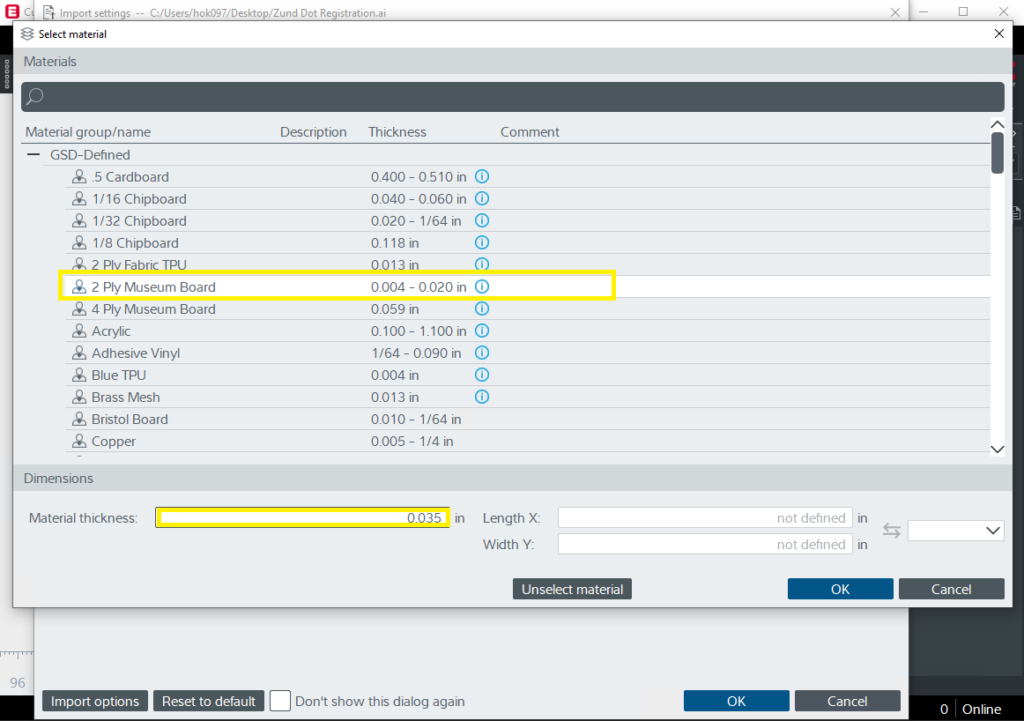
Select Material and type in material thickness, then press OK.
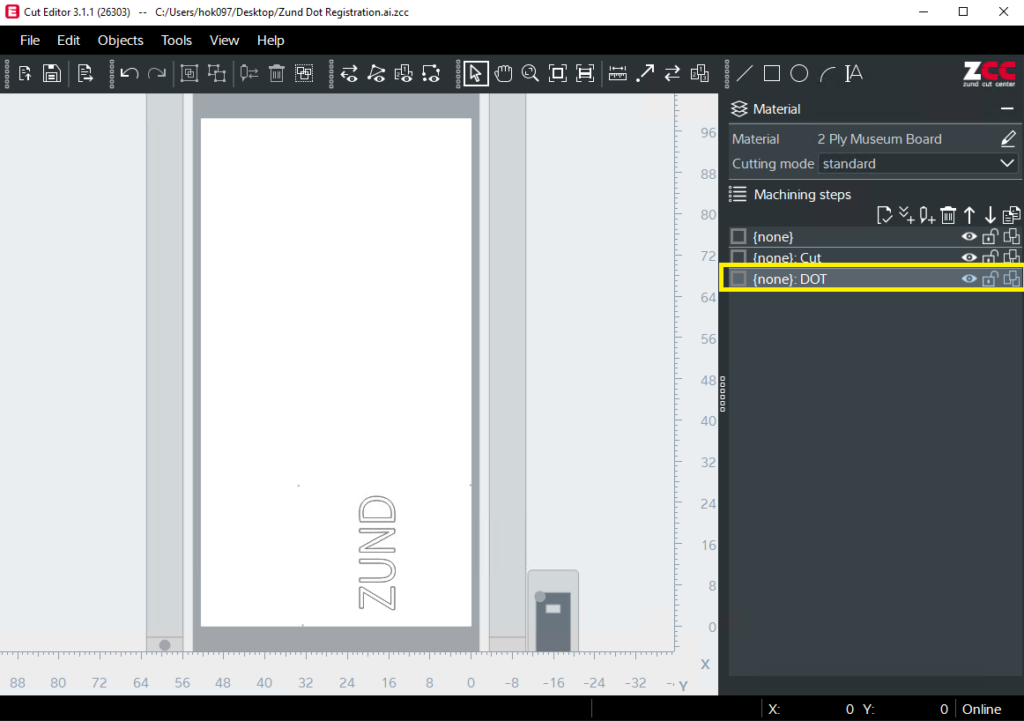
Double Click the layer with the dot to assign method.
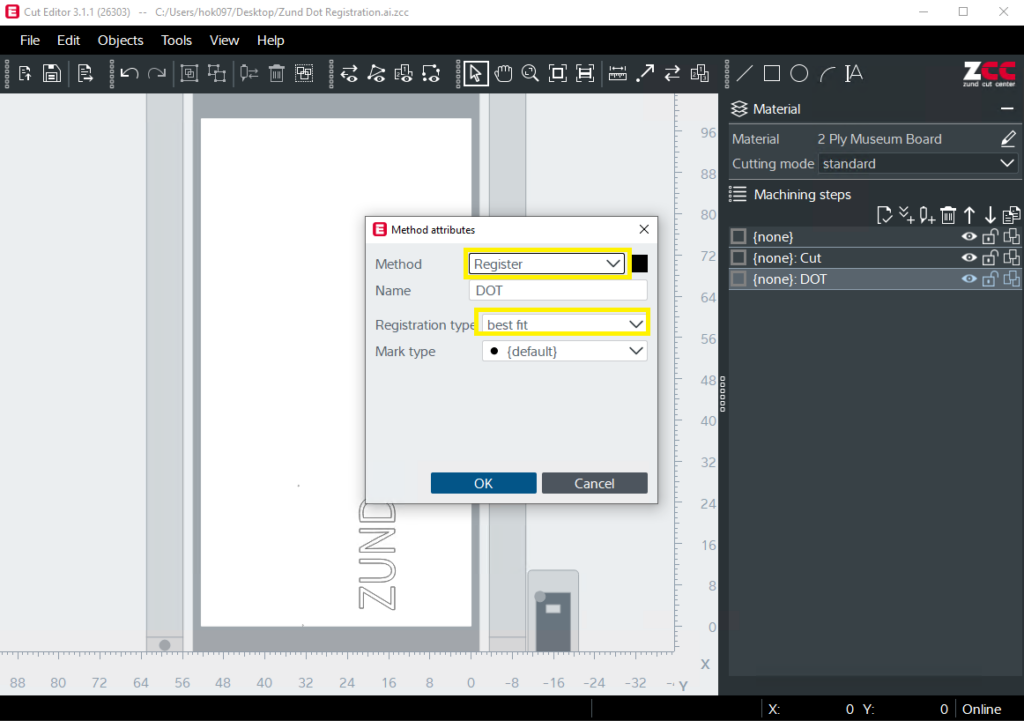
Select “Register” as method for the layer with dot. and choose “best fit” as registration type.
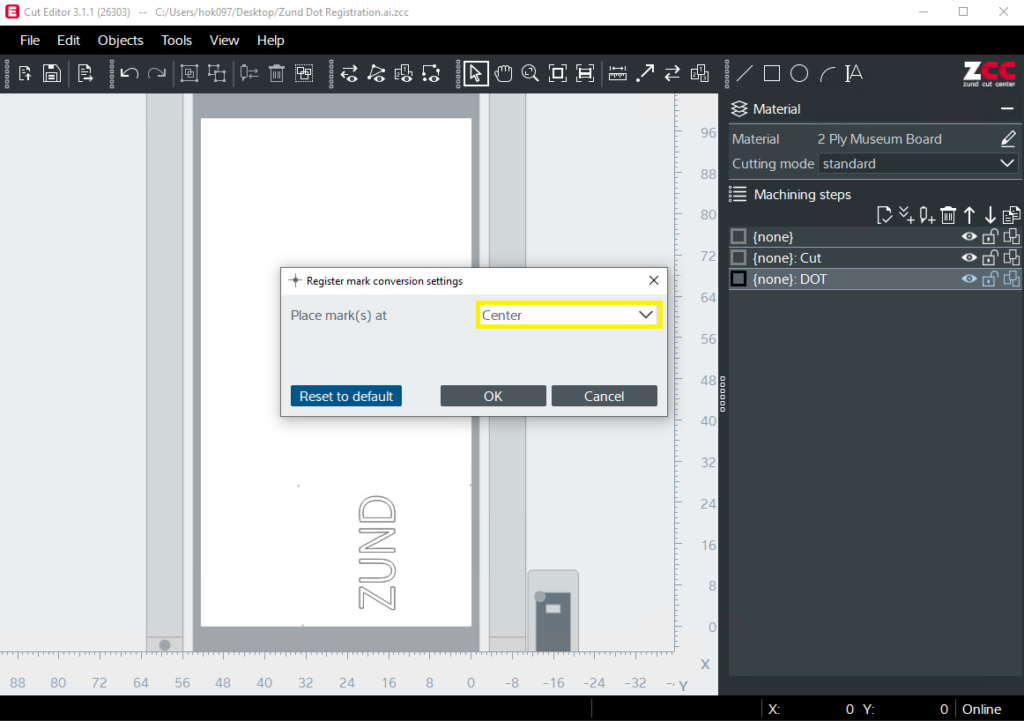
Place marks at “Center”
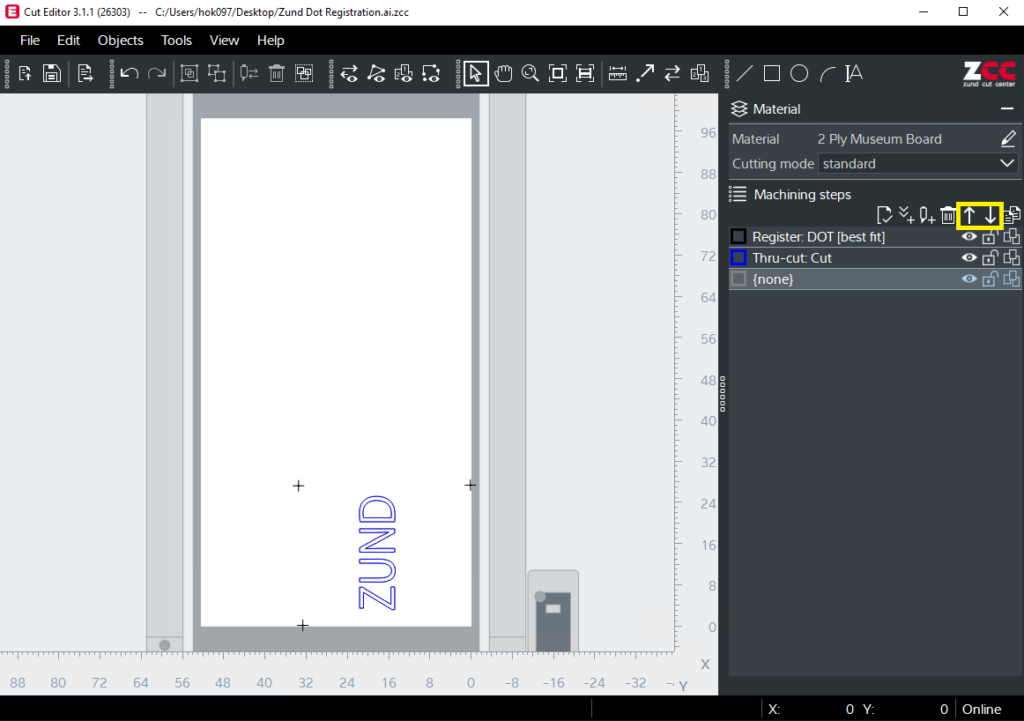
Select Method for other layers and use the arrow button to organize the layer as correct order.
Related: Metal Routing File Setup, Rectangular Board File Setup (Rectangular Registration)
