
Announcements
- Reserving Machine TimeReserve Machine Time using the FabJob App. Use a TMP folder for short-term file storage for walk-up use and consultations.
Workflow
Since the 3D Printer device types at the GSD are each accessed differently, there are three distinct workflows, as described below.
If you find it convenient, you may wish to save files to 3DTMP on your personal device so you can share them more easily with Lab staff for consultations.
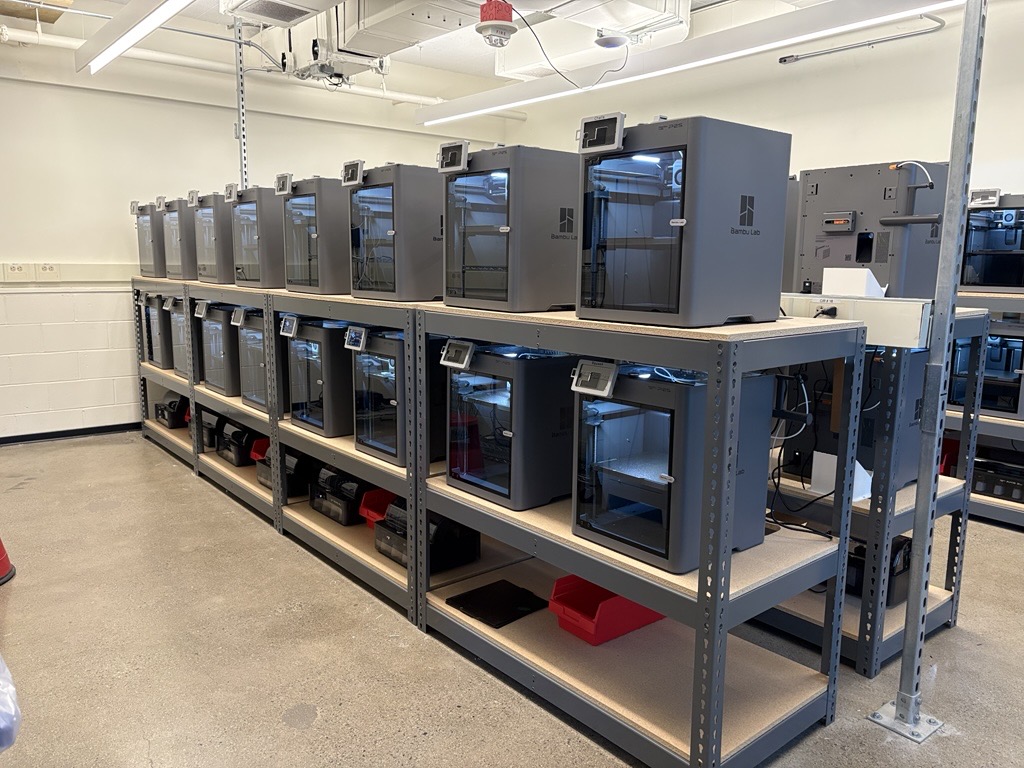
Self-Serve Bambu P2S Printers (Using own Material):
- Prepare 3MF File
- Log in to Simply Print (Select Education and “Harvard University”)
- Slice your file (cloud slicer in SimplyPrint or other)
- Save the sliced file in your SimplyPrint files
- In the 3D printer room, load the material and the build plate into a free Printer
- Log in to SimplyPrint on your phone (App or browser)
- Search for the name of the printer you prepared and click on it
- Click on “start print” (if needed, click on “print removed”)
- Choose the file you saved
- Send it to print
- Answer the questions prompted on the screen
- Wait in the room until the first layer is printed
- Monitor Print Progress on the camera
- Retrieve Parts and Materials promptly
- Return the Build Plate to the wired shelf “dirty plate” bin
- Remove Support Structures as Necessary (we have a desk with pliers inside the room)
Self-Serve Bambu P2S Printers (Billable):
- Prepare 3MF File
- Log in to Simply Print (Select Education and “Harvard University”)
- Slice your file (cloud slicer in SimplyPrint or other)
- Save the sliced file in your SimplyPrint files
- In the 3D printer room, load the build plate into a free Printer
- Log in to SimplyPrint on your phone (App or browser)
- Search for the name of the printer you prepared and click on it
- Click on “start print” (if needed, click on “print removed”)
- Choose the file you saved
- Send it to print
- Answer the questions prompted on the screen
- Wait in the room until the first layer is printed
- Monitor Print Progress on the camera
- Retrieve Parts
- Return the Build Plate to the wired shelf “dirty plate” bin
- Remove Support Structures as Necessary (we have a desk with pliers inside the room)
Full-Serve Objet 260 (Billable):
- Prepare STL File
- Submit a job using the Online Job Submittal App
- Respond to Communication from Lab Staff on Teams
- Monitor the APP for updates on your job
- Retrieve Parts Promptly
- Remove Support Material as Necessary
Full-Serve Bambu Multicolor Printer (Billable):
Prepare 3MF files
- Open Bambu Studio
- Select “bambu X1C” as the printer model
- select “texture or smooth” plate
- Upload your 3MF file and slice it
- Save the file as a “project”
- Submit a job using the Online Job Submission App
- Respond to Communication from Lab Staff on Teams
- Monitor the APP for updates on your job
- Retrieve Parts Promptly
- Remove Support Material as Necessary
Prepare 3MF Files
Regardless of the device type chosen, all 3D printing at the GSD requires students to prepare a printable 3MF or STL file.
While this can be accomplished in most 3D modeling applications, the most commonly used application at the GSD is Rhino, so the following may reflect terminology specific to that application.
- Prepare your Rhino geometry for 3D printing. Some things to keep in mind:
- Make sure the model is located near the World Top Origin. The geometry scale should be 1:1 to the size of the printed part.
- Pay attention to feature sizes and wall thicknesses, ensuring they remain above the recommended minimums.
- Volumes must be closed.
- Use boolean operations to create one closed volume for each part. Avoid creating intersecting volumes.
- Avoid creating coplanar surfaces that touch each other.
- Avoid creating shared edges between two adjacent volumes (non-manifold edges).
- Surfaces must not “twist” to be on both the inside and outside of a volume.
- Ensure the polysurfaces or meshes:
- is watertight (no holes)
- has no non-manifold edges
- all normals are unified (point in a consistent direction)
- Convert model units to millimeters, without scaling.
- Export model as .3mf or .stl file (binary coding)
- If the file size exceeds 25 MB, the mesh settings may need to be changed to produce fewer, larger triangular faces.
For more detailed information associated with each device type, see Device Types and Tutorials.
Submit File
The Fabrication Lab staff will provide 3D printing services to students for the Objet 260 and Bambu X1 multi-material printers only. All other 3D Printer types are self-serve.
Step 1:
Submit the form online, uploading file(s) and selecting a material for each file.
Step 2:
Monitor the application and Microsoft Teams for changes in job status (eg. approved, estimates, returned for correction, completed, pick-up date/time, billed).
Be attentive to email notifications from Microsoft Teams. Lab staff will contact you if there are questions or issues with your file(s) that need to be addressed.
Once estimates are provided, you will need to approve these estimates through the application before printing starts. Once the print has started, it cannot be canceled from the application, and you will be billed for any materials consumed.
Step 3:
Retrieve completed parts from Gund L40C.
Applications
| Application | Device Type | Workflow Step | Responsibility |
| Rhino or Other | All | Prepare 3MF or STL file | Student |
| Simply Print or Other | Bambu P2S | Slice file and generate G-code | Student |
| Bambu Studio | Bambu X1 | Slice file and generate 3MF | Student |
| Simply Print | Bambu P2S | Send file to Printer | Student |
| Microsoft Power Apps | Objet and Bambu X1 | Submit Files | Student |
| Microsoft Teams | Objet and Bambu X1 | Communicate | Lab Staff + Student |
| GrabCad | Objet | Slice file and send to Printer | Lab Staff |
| Simply Print | Bambu X1 | Send file to Printer | Lab Staff |
3D Printer Hours
While the Self-Serve 3D Printers are typically available whenever Gund Hall is open during the academic semesters, hours may be limited in the summer and between semesters. The Full-Serve Printers are TA-Operated and can be reserved using the FabJob App.
Check the Calendar to determine when Technical Assistants are on duty or whether the space is closed.
View the 3D Printing Room Front Camera, Gund 3rd floor
View the 3D Printing Room Back Camera, Gund 3rd floor
Need Help?
Contact a 3D Printer Technical Assistant by email at [email protected] or visit us in Gund L40 or adjacent to the Gund 3rd Floor South Printing Room during the office hours listed on the Calendar.
Reserve the 3D Printer
Please use the FabJob App to reserve the multi-material 3D printers.